
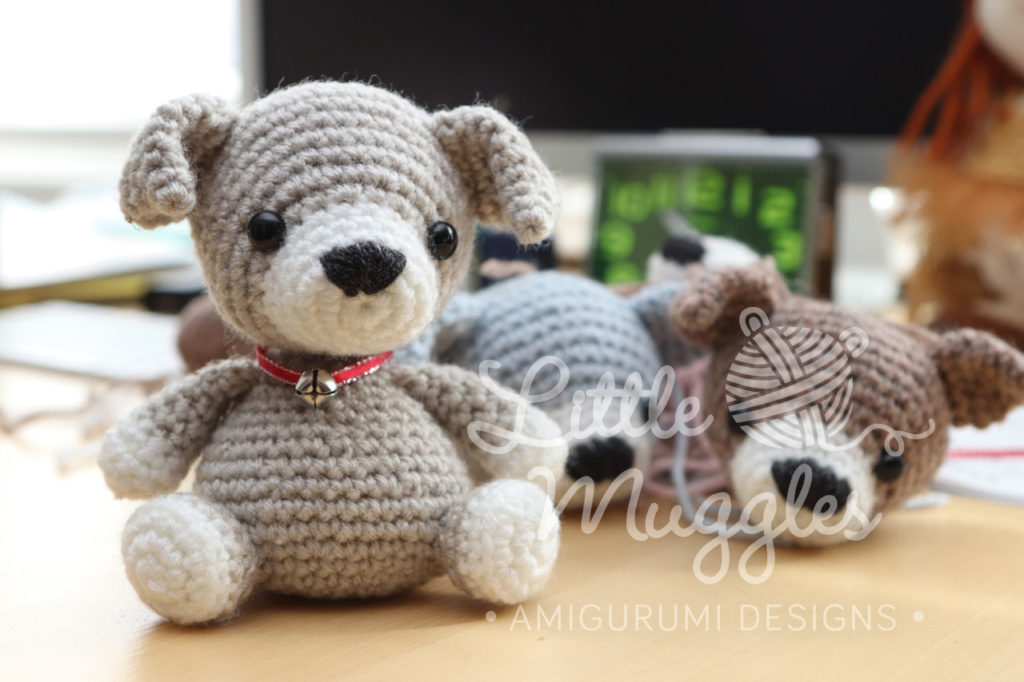
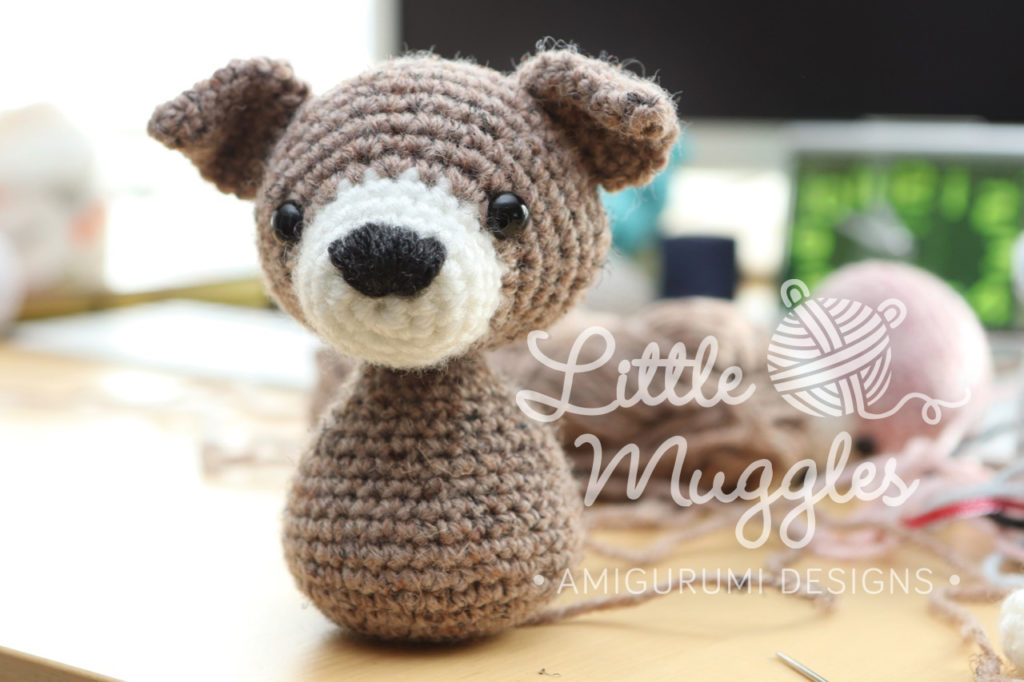
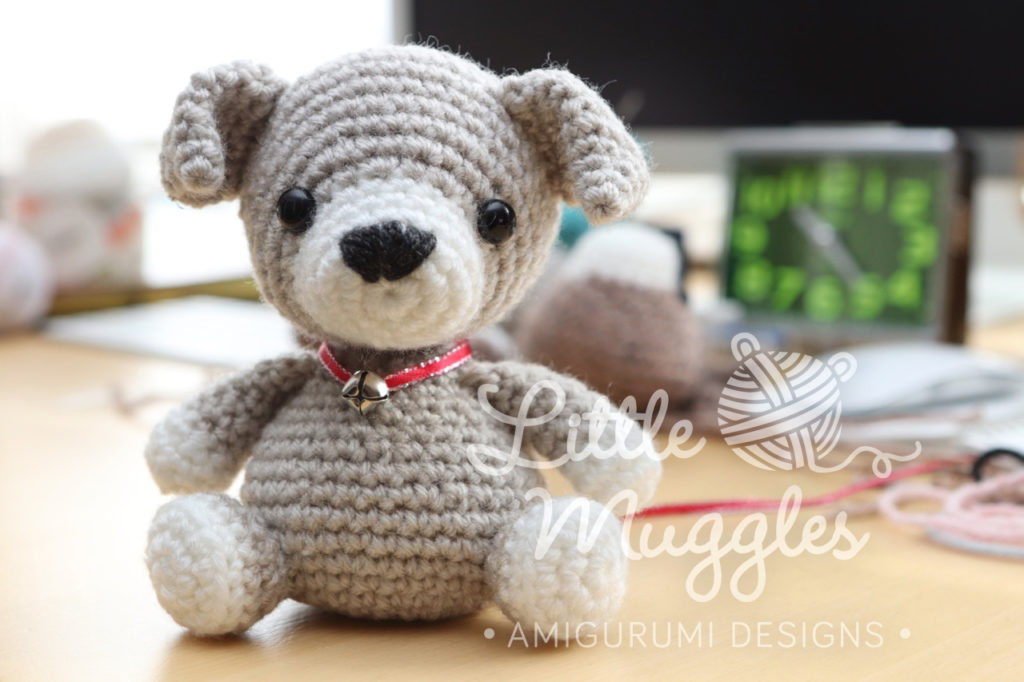
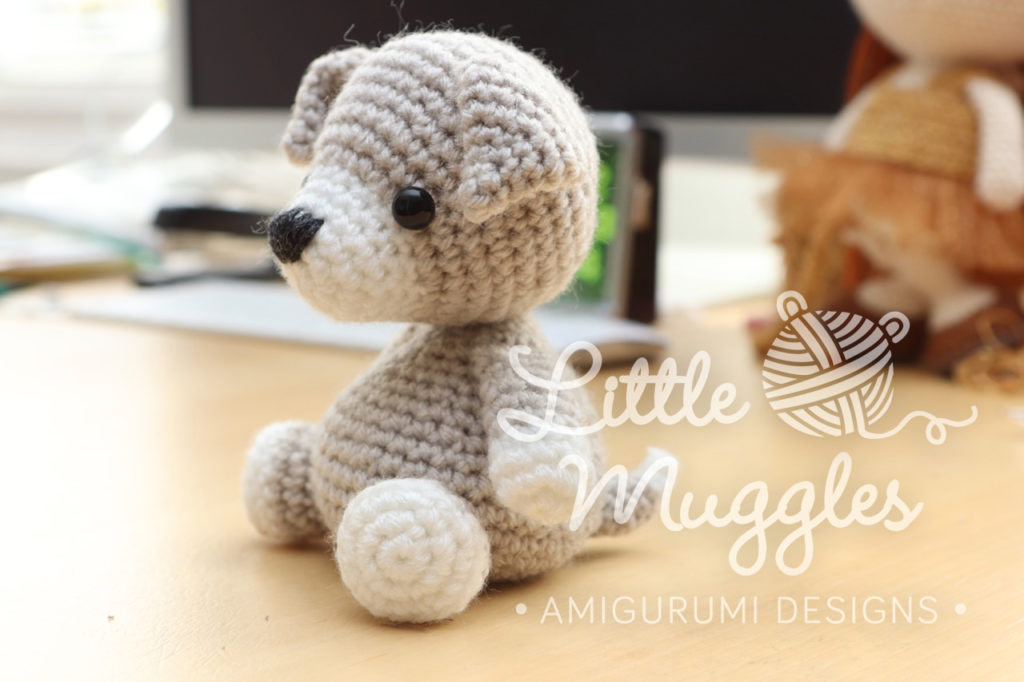
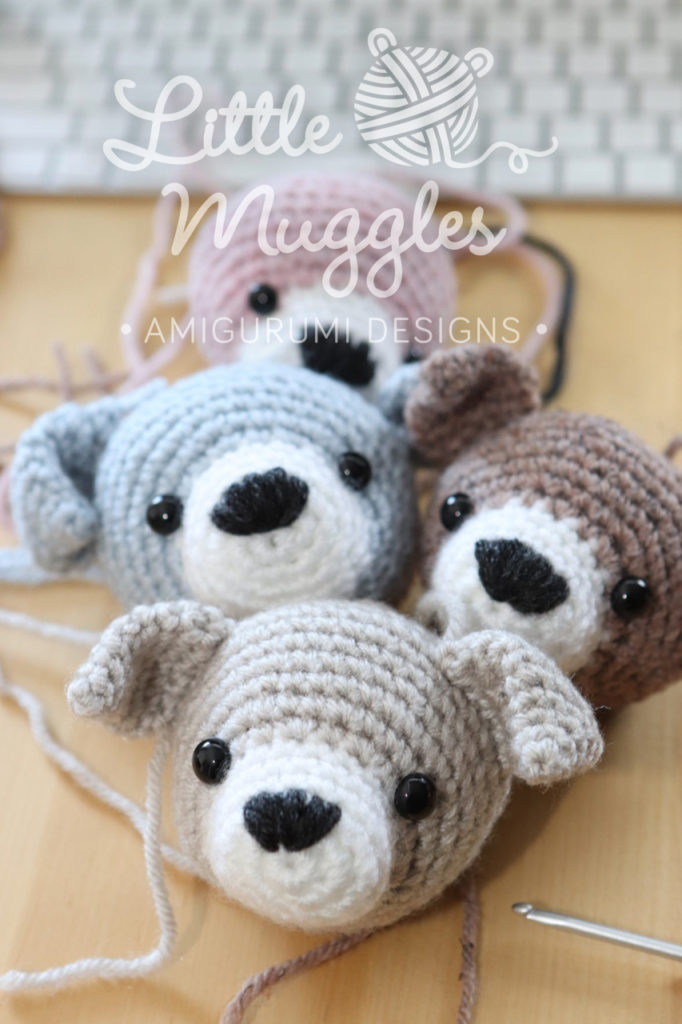
My plush puppy buddies are finished! When made with the indicated yarn, each puppy is just under 5 inches tall. (approximately 12.5cm, not including the ears!) I made my dolls with polyester pellets stuffed in the body, but they can be made with just fiber fill as well. They can be easily personalized – you might embroider intitals on the body or hang a special sentimental charm around it’s neck… there are many possiblities here!
Please enjoy the pattern and send along pictures of your finished dogs!
MATERIALS I USED:
- 3.5mm crochet hook
- 10mm black safety eyes
- main color yarn (for my gray puppy, I used Lion Brand/Vanna’s Choice worsted weight yarn in “Linen”; the brown puppy is made with Lion Brand/Wool-Ease worsted weight yarn in “Mushroom”)
- white yarn
- dark gray yarn for nose (I used Lion Brand/Vanna’s Choice in Dark Grey Heather)
- yarn needle
- stitch marker
- fiber fill
- polyester pellets for filling the body (found at my local JoAnns store)
- ribbon
- small jingle bell
ABBREVIATIONS
- sc single crochet
- inc increase
- dec decrease
- BLO back loops only
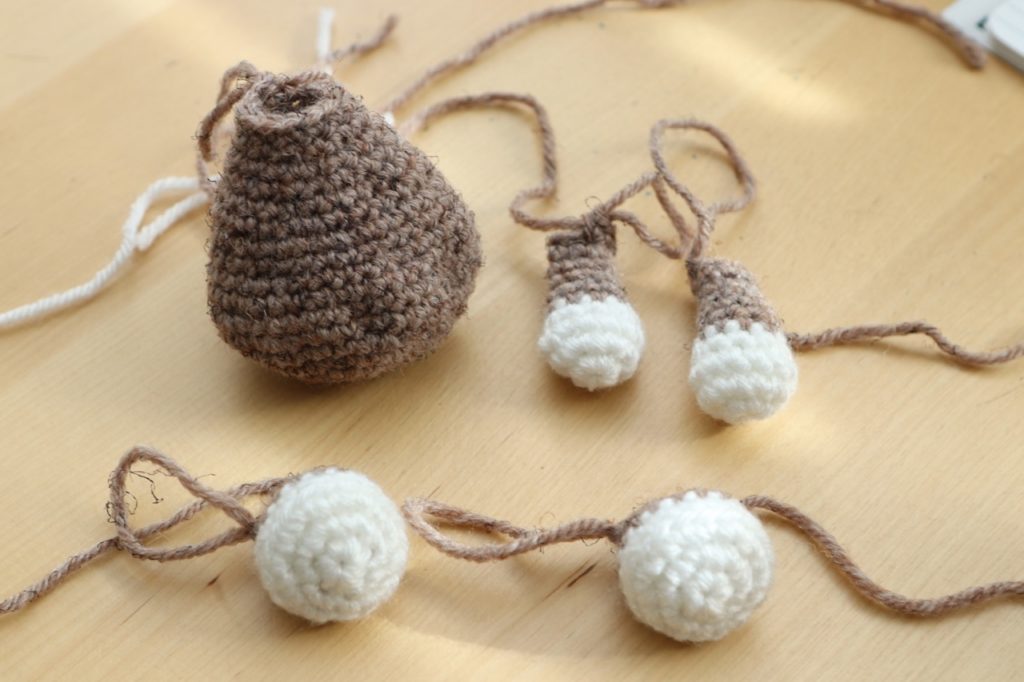
HEAD
start with white yarn
- Rnd 1: make 6sc into magic ring
- Rnd 2: inc in each st [12]
- Rnd 3: (sc, inc in next st) repeat around [18]
- Rnd 4-6: sc in all 18 st [18]
- change to main color yarn
- Rnd 7: (sc, inc in next st) repeat 9 times [27]
- Rnd 8: (3sc, inc in next st) repeat 6 times, 3sc [33]
- Rnd 9: sc in all 33 st
- Rnd 10: (4sc, inc in next st) repeat 6 times, 3sc [39]
- Rnd 11: sc in all 39 st
- Rnd 12: (5sc, inc in next st) repeat 6 times, 3sc [45]
- Rnd 13: sc in all 45 st
- Rnd 14: (5sc, dec) repeat 6 times, 3 sc [39]
- Rnd 15: (4sc, dec) repeat 6 times, 3sc [33]
- Rnd 16: sc in all st
- Rnd 17: (3sc, dec) repeat 6 times, 3sc [27]
- Rnd 18: sc in all 27 st
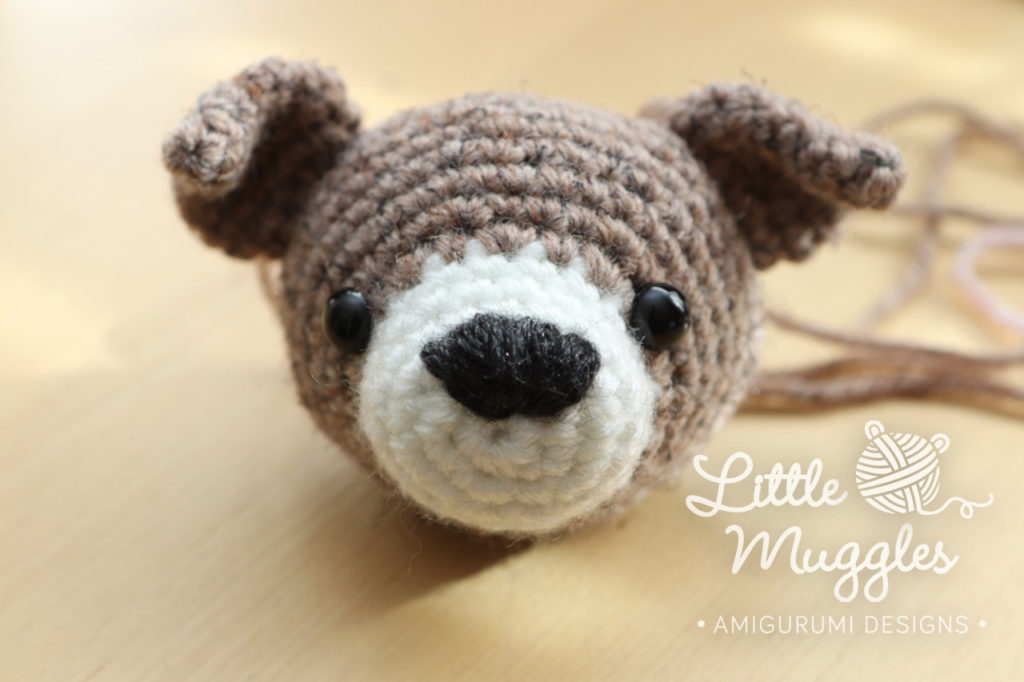
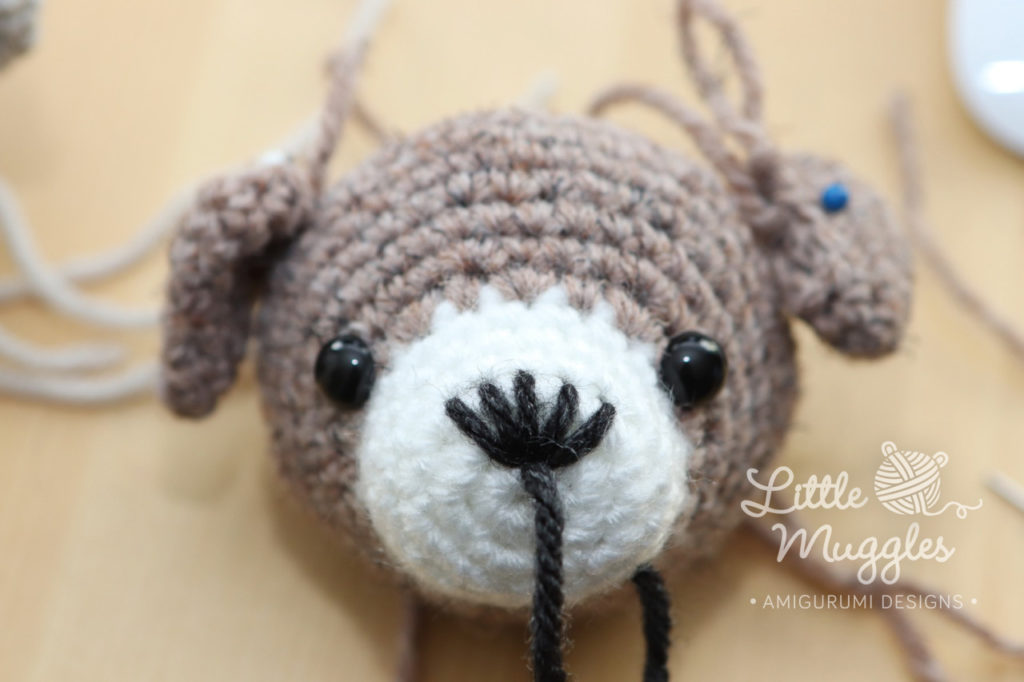
- This is where I like to start stuffing the head and placing the eyes. (between rounds 7 & 8, with 9 stitches between). I like to get a general idea of the face because I like to sew the nose at this point as well. I can tie the loose ends inside the head while I still have enough room to work!
- Rnd 19: (2sc, dec) repeat 6 times, 3sc [21]
- Finish stuffing the head if you need to
- Rnd 20: (sc, dec) repeat 6 times, 3sc [15]
- Rnd 21: dec 7 times, sc [8]
- Rnd 22: dec once, fasten off and weave in tail
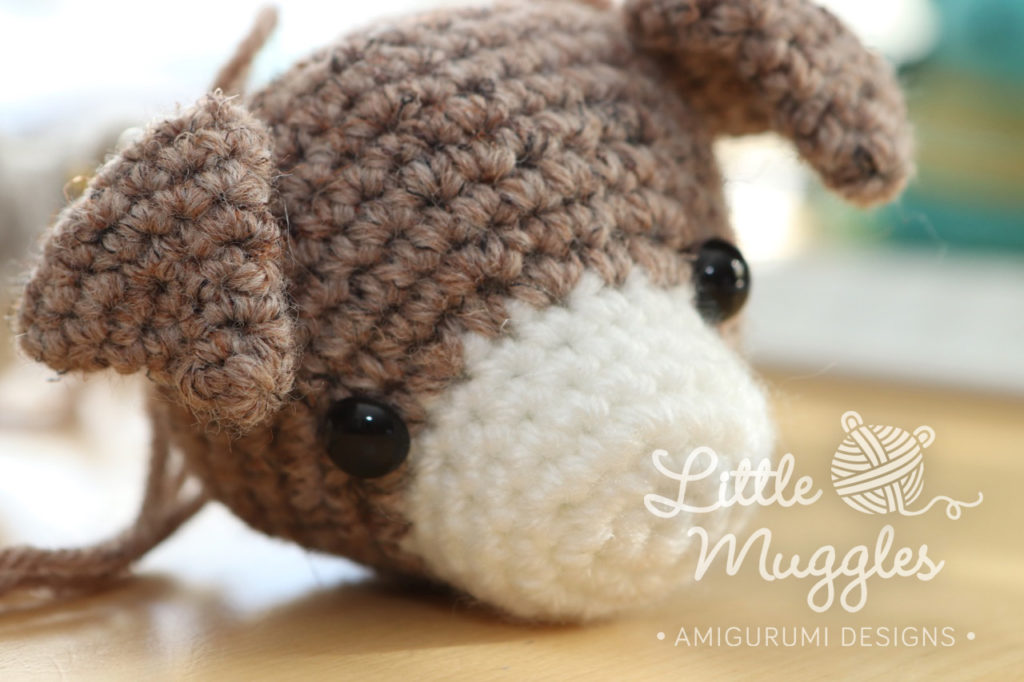
EARS (make 2)
- Rnd 1: make 4sc into magic ring
- Rnd 2: sc in all 4 st [4]
- Rnd 3: inc in each st [8]
- Rnd 4: sc in all 8 st [8]
- Rnd 5: (sc, inc in next st) repeat 4 times [12]
- Rnd 6: sc in all 12 st [12]
- Rnd 7: (2sc, inc in next st) repeat 4 times [16]
- Rnd 8: sc in all 16 st [16]
- Rnd 9: (sc, dec) repeat 5 times, sc [11]
Fasten off and leave a long tail for sewing. Flatten the ears and sew the openings shut before attaching to head.
 BODY
BODY
- Rnd 1: make 6sc into magic ring
- Rnd 2: inc in each st [12]
- Rnd 3: (sc, inc in next st) [18]
- Rnd 4: (2sc, inc in next st) [24]
- Rnd 5: (3sc, inc in next st) [30]
- Rnd 6: sc in all 30 st [30]
- Rnd 7: (4sc, inc in next st) [36]
- Rnd 8: (5sc, inc in next st) [42]
- Rnd 9: sc in all 42 st [42]
- Rnd 10: (5sc, dec) repeat 6 times [36]
- Rnd 11: sc in all 36 st [36]
- Rnd 12: (4sc, dec) repeat 6 times [30]
- Rnd 13: sc in all 30 st [30]
- Rnd 14: (3sc, dec) repeat 6 times [24]
- Rnd 15: sc in all 24 st [24]
- Rnd 16: (2sc, dec) repeat 6 times [18]
- Rnd 17: sc in all 18 st [18]
- Rnd 18: (sc, dec) repeat 6 times [12] [Note: I like making my puppy with a small neck.. if you prefer a bigger neck, you can omit rounds 18 & 19 completely]
- Rnd 19: sc in all 12 st [12]
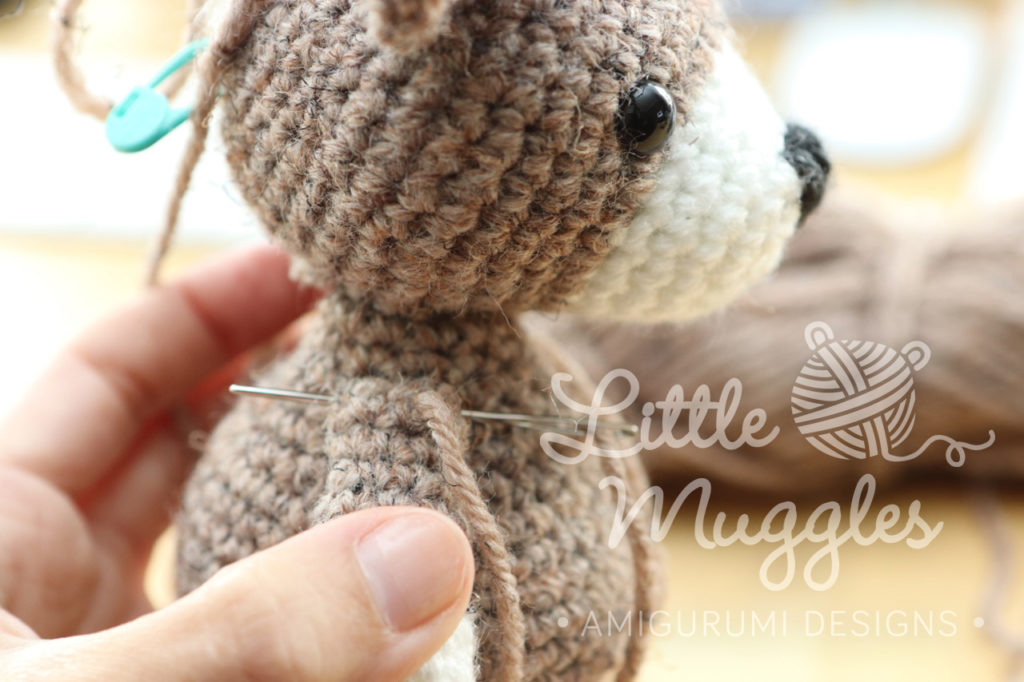
- Fasten off and leave a long tail for sewing the head on
ARM (make two)
start with white yarn
- Rnd 1: make 6sc into magic ring
- Rnd 2: inc in each st [12]
- Rnd 3: sc in all 12 st [12]
- Rnd 4: (2sc, dec) repeat 3 times [9]
change to main color yarn
- Rnd 5-7: sc in all 9 st [9]
- Rnd 8: (2sc, dec) repeat twice, sc [7]
- Rnd 9-10: sc in all 7 st [7]
- fasten off and leave a tail for sewing. Stuff the arms, concentrating the stuffing towards the paw, using less and less stuffing as you move up. Sew the arms shut before attaching to the body.
FEET (make two)
start with white yarn
- Rnd 1: make 6sc into magic ring
- Rnd 2: inc in each st [12]
- Rnd 3: (sc, inc in next st) repeat around [18]
- Rnd 4: BLO sc in all st [18]
change to main color yarn
- Rnd 5: sc in all 18 st [18]
- Rnd 6: (sc, dec) repeat around [12]
- Rnd 7: (2sc, dec) repeat 3 times [9]
- Fasten off and leave a tail for sewing. Stuff each foot and sew onto body, making sure they are symmetrical. See photos for appropriate placement.
TAIL
start with white yarn
- Rnd 1: make 4sc into magic ring
- Rnd 2: sc in all 4 st [4]
- Rnd 3: inc in all 4 st [8]
change to main color yarn
- Rnd 4-6: sc in all 8 st [8]
- Rnd 7: inc, 3sc, dec, 3sc [8]
Fasten off and leave a tail for attaching to body
ASSEMBLY
The ears are placed at round 14, with about 10 stitches between them.
Fill the body 3/4 of the way with polyester pellets/beads. Depending on the tightness of your stitches, the beads might fall out of the openings between your stitches. If this is the case, you can use a bit of nylon material (ie pantyhose) to create a bag filled with the polyester beads and put this into the doll’s body. Stuff the remaining space with fiber fill. Position the head and sew it onto the body.
Next, position the arms and legs symmetrically and sew them on. I like to sew the openings of the arm shut before attaching, but you do not need to do this for the legs.
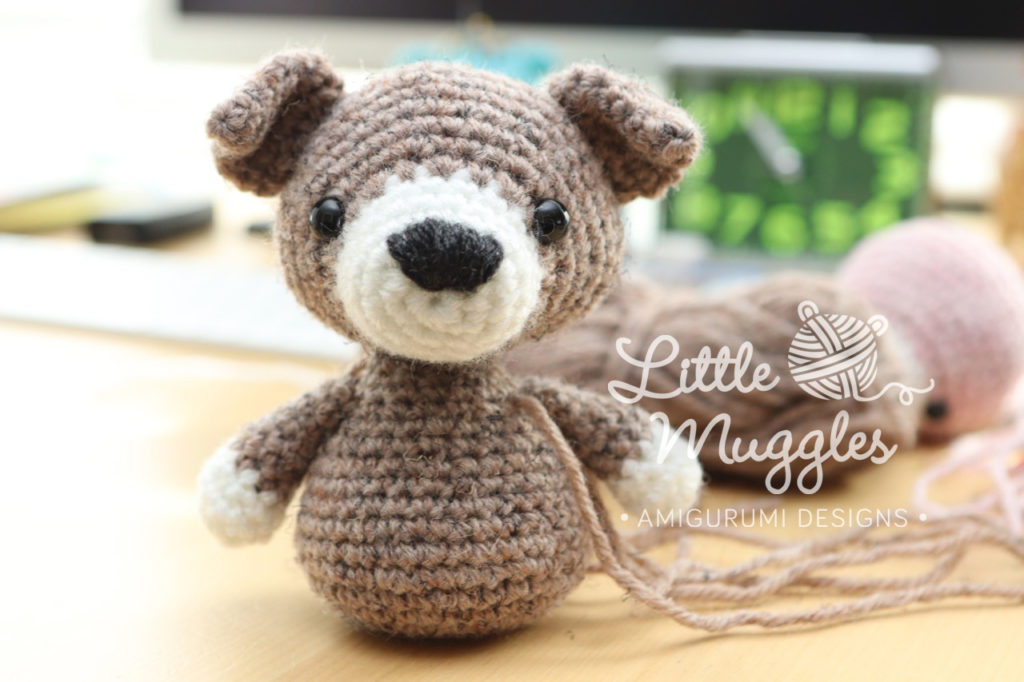
Lastly, sew the tail onto the backside of your doll. Try to center it and make sure it doesn’t interfere with the balance of the doll when it’s placed on a flat surface. The puppy should be very stable since it has a nice flat bottom!
You are finished! Now comes the fun part of personalizing your doll and making it uniquely yours! Think ribbons, bells, pendants, initials, scarves, and more! Have fun!!
COPYRIGHT 2017 – LittleMuggles
This pattern is for personal use only. Please do not resell, redistribute, or rewrite this pattern in any way. Mass production/factory production of dolls made from this pattern is not allowed. Please do not claim my patterns or amigurumi designs as your own. You may sell your own hand-made finished dolls made from this pattern if you credit the design to “Little Muggles” and provide a link to this website. Thank you so much for your cooperation!
The finished doll as written is intended for decorative purposes only and not for use as a child’s toy. (there are small parts that can be swallowed) Please use caution and keep it out of reach of small children.