

When made with the indicated yarn and crochet hook size, this doll works up to be approximately 6.5 inches/16.5 cm tall.
Hobbii Friends Cotton 8/4 – 5 colors used (no more than 1 skein is needed of each color)
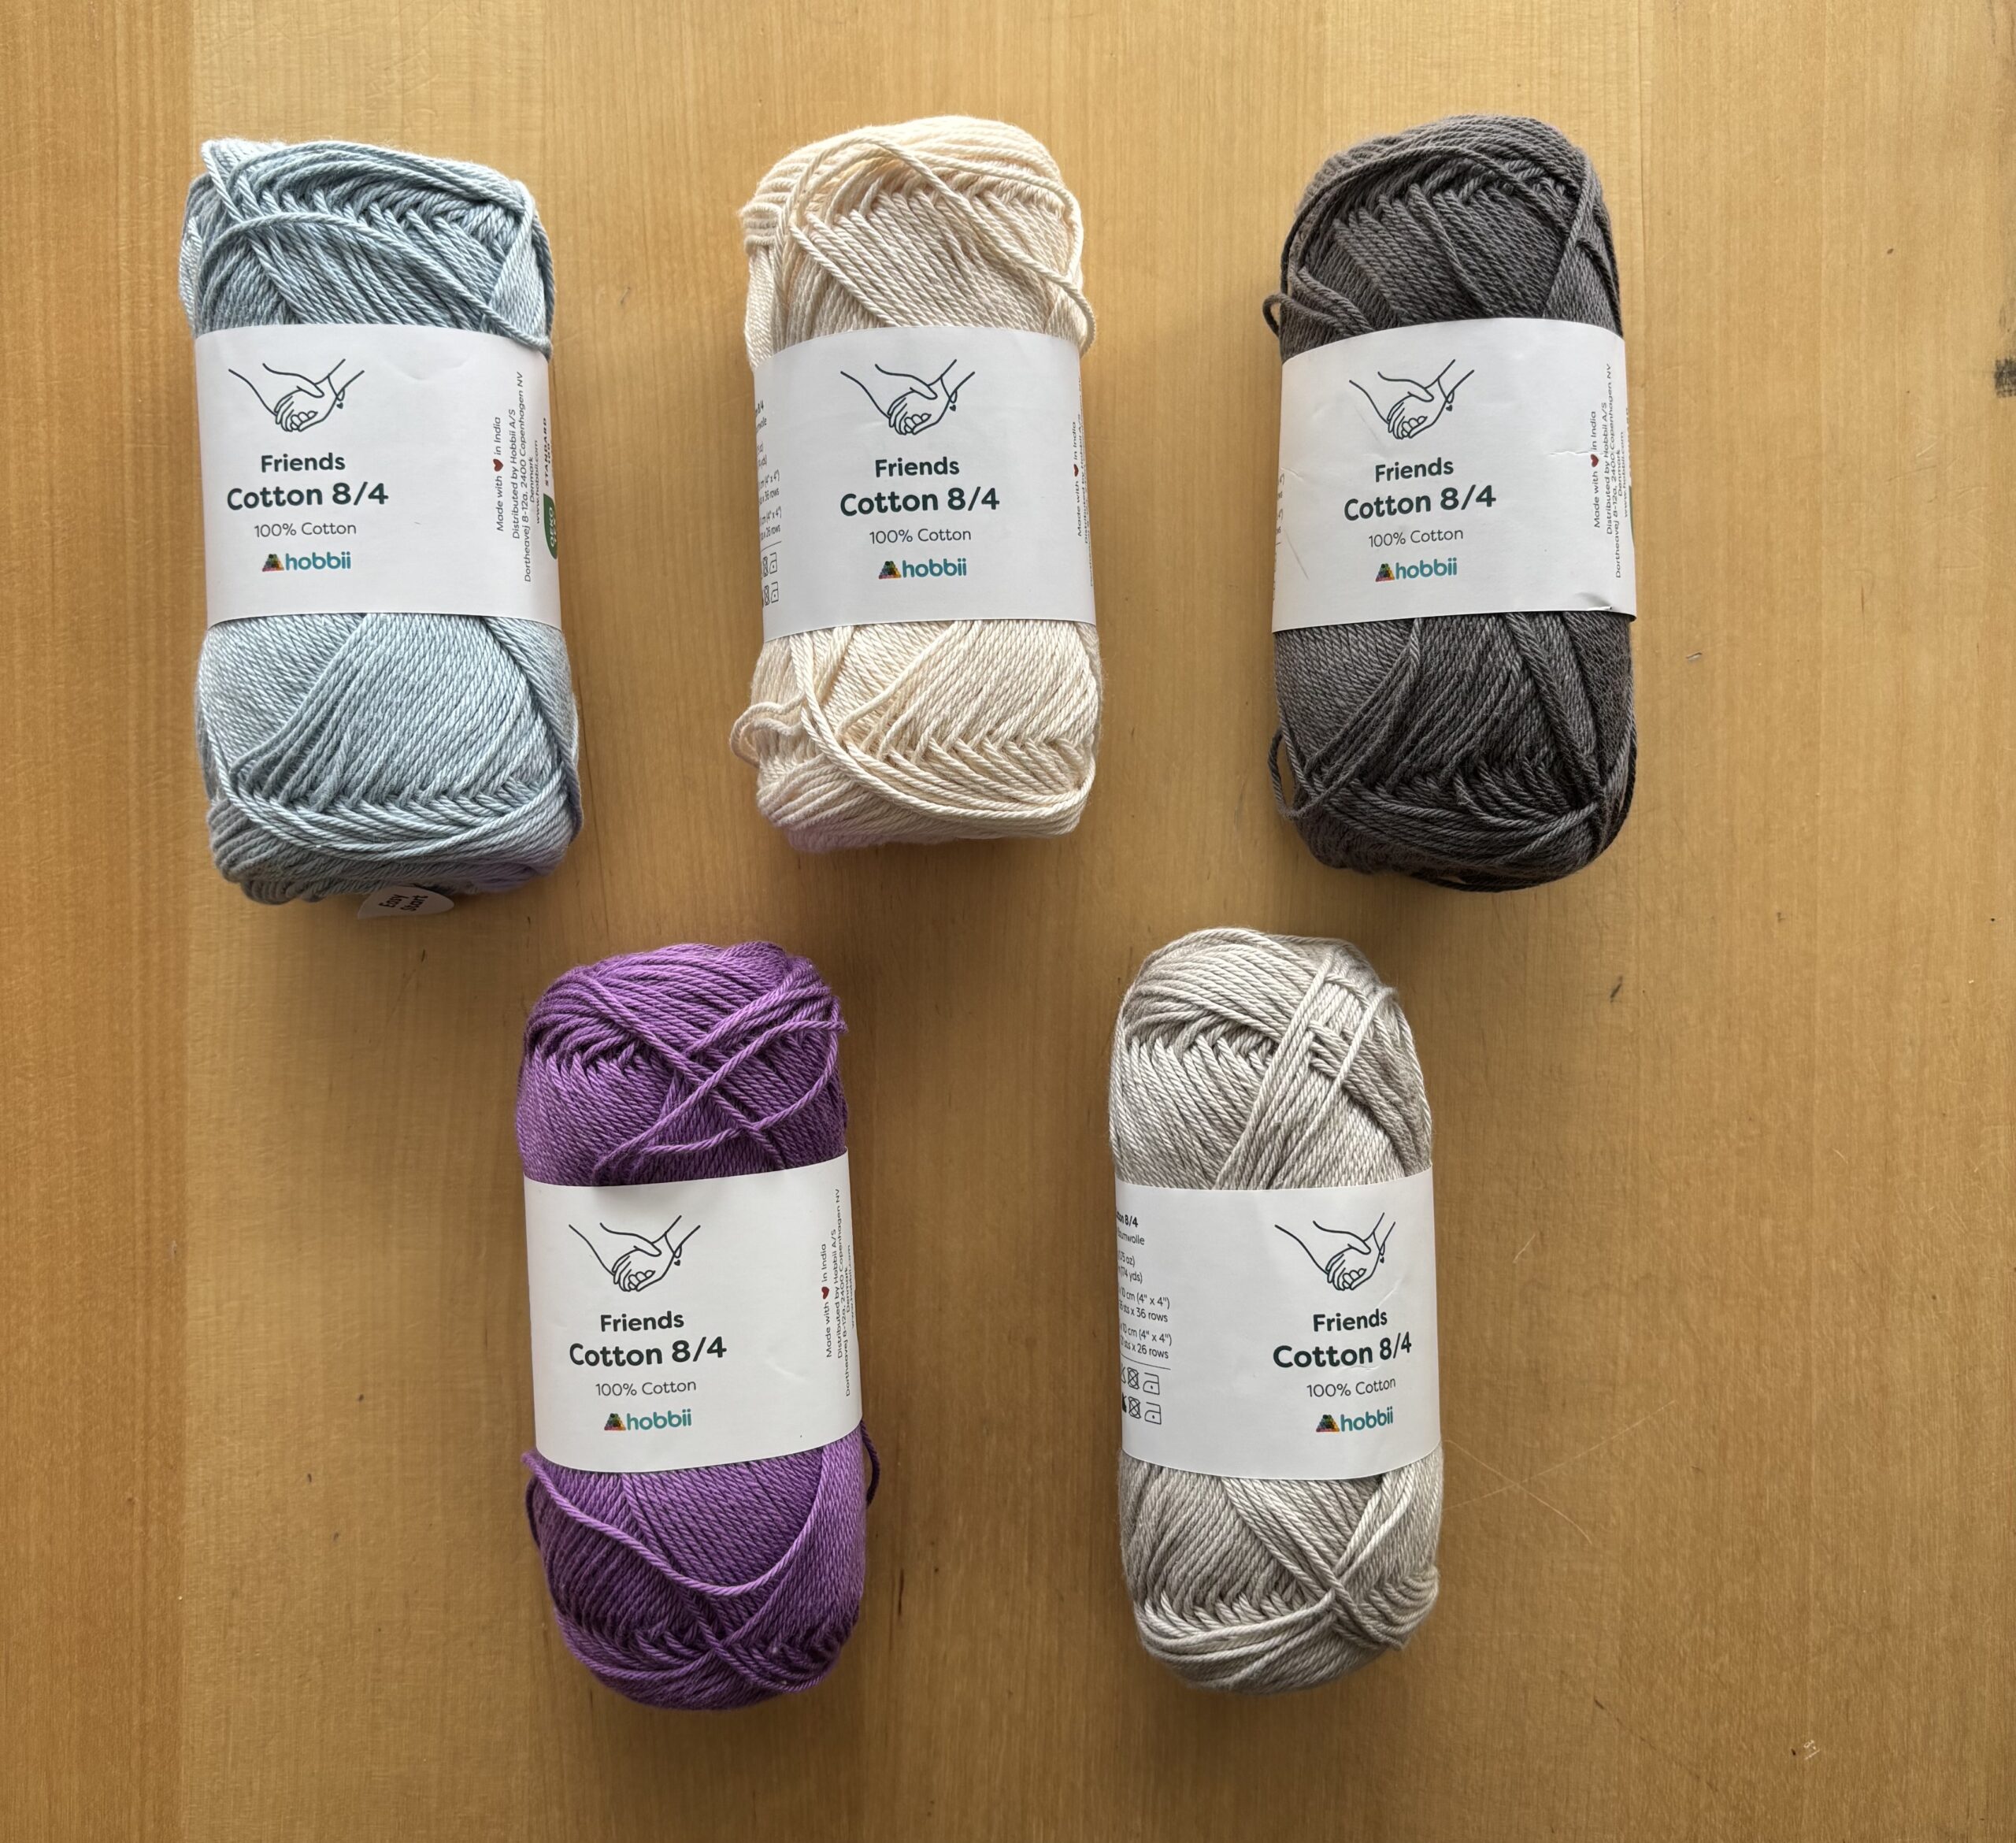
- silver
- blue
- cream
- purple
- dark gray
MATERIALS
- 2.25 crochet hook
- 9mm black safety eyes
- fiber fill
- two small buttons for nostrils
- yarn needle for sewing
All stitches should be worked under both loops unless otherwise indicated with BLO (back loop only) The doll will be made from the head down towards its feet.
Use gray yarn
- Rnd 1: make 6sc into magic ring
- Rnd 2: 2sc in each st [12]
- Rnd 3: (sc in next st, 2sc into next st) repeat 6 times [18]
- Rnd 4: (sc in next 2 st, 2sc into next st) repeat 6 times [24]
- Rnd 5: (sc in next 3 st, 2sc into next st) repeat 6 times [30]
- Rnd 6: (sc in next 4 st, 2sc into next st) repeat 6 times [36]
- Rnd 7: sc in each st [36]
- Rnd 8: (sc in next 5 st, 2sc into next st) repeat 6 times [42]
- Rnd 9: (sc in next 6 st, 2sc into next st) repeat 6 times [48]
- Rnd 10: (sc in next 7 st, 2sc into next st) repeat 6 times [54]
- Rnd 11: (sc in next 8 st, 2sc into next st) repeat 6 times [60]
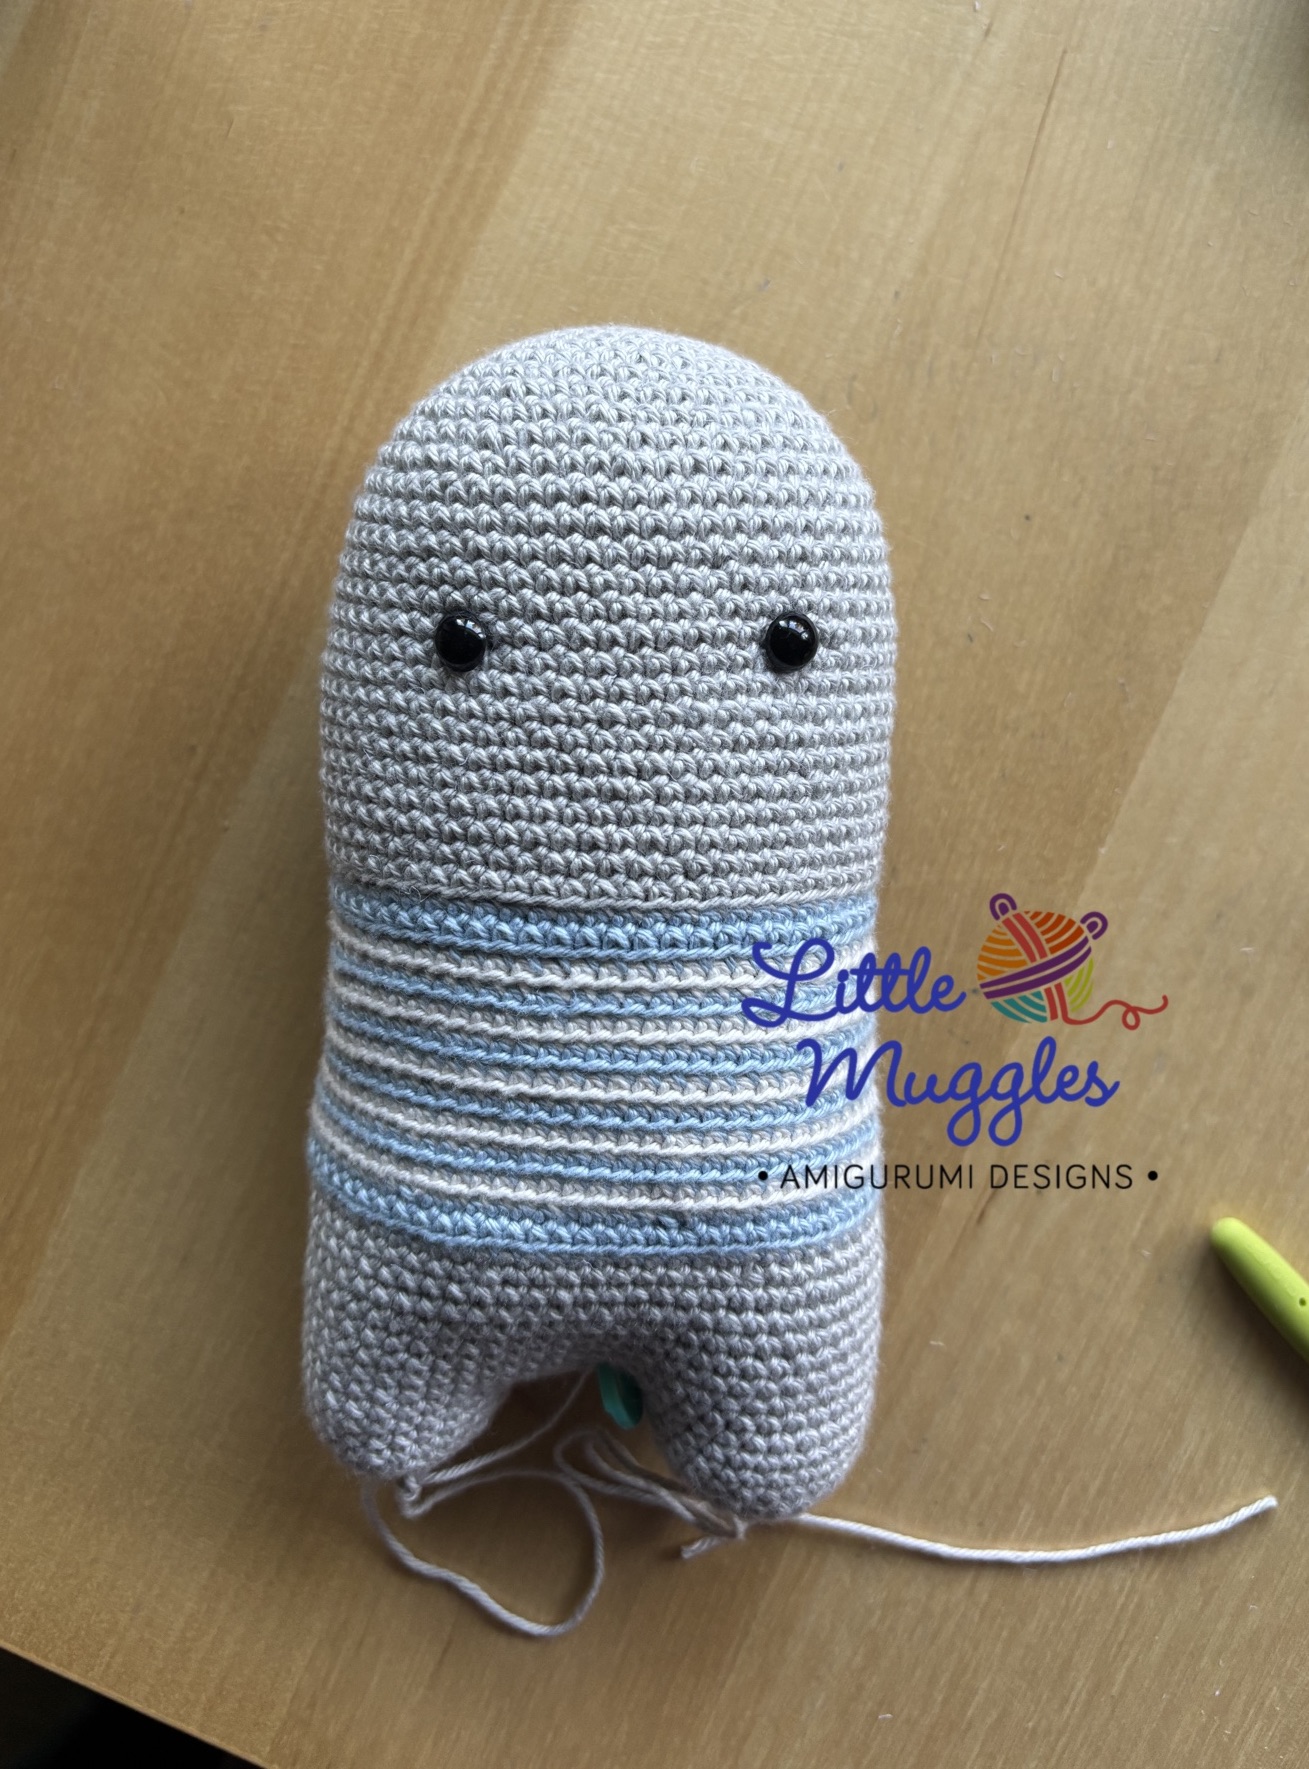
- Rnd 12-27: sc in each st [60]
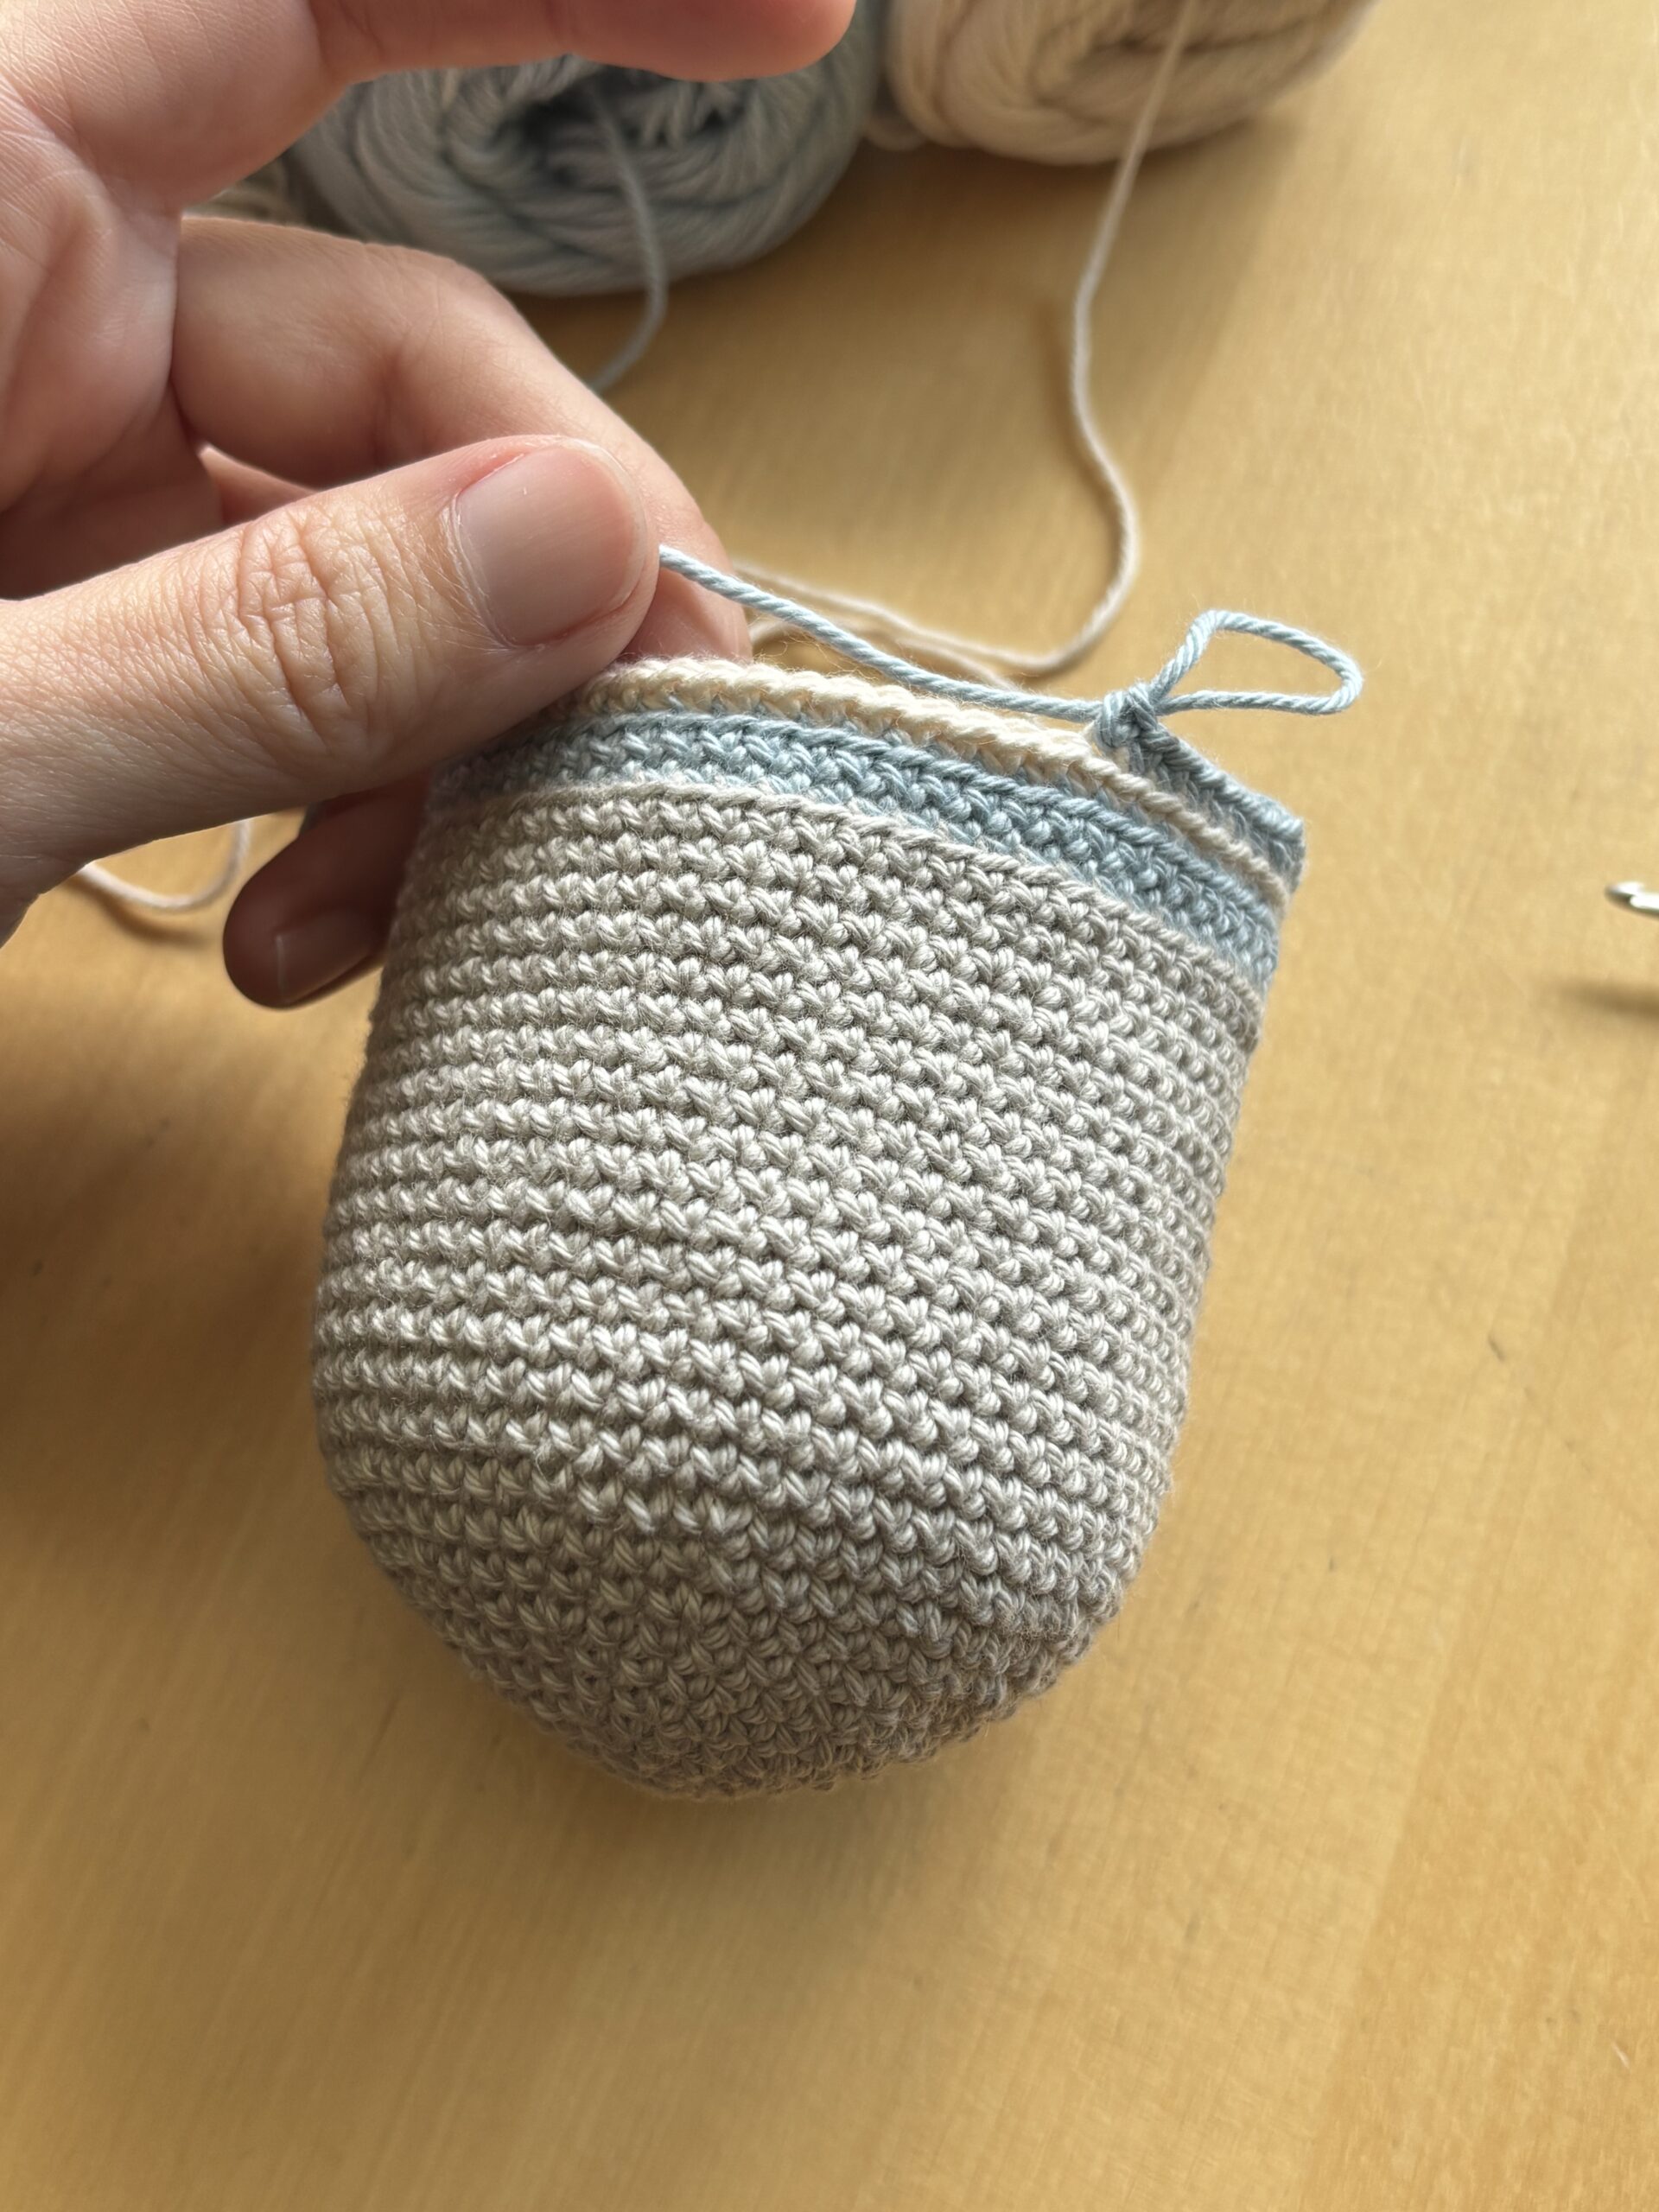
- Now we begin the shirt…change to blue yarn
- Rnd 28: BLO sc in each st [60]
- Rnd 29: sc in each st [60]
- change to cream yarn (Note: each subsequent round should alternate yarn colors.
- Rnd 30: BLO sc in each st [60]
- Rnd 31: BLO sc in next 9st, 2sc into next st [66]
- Rnd 32-35: BLO sc in each st [66] (don’t forget to alternate colors!)
- Rnd 36: BLO (sc in next 10 st, 2sc into next st) repeat 6 times [72]
- Rnd 37: BLO sc in each st [72]
- Rnd 38: BLO sc in each st [72]
- Rnd 39: BLO (sc in next 10 st, dec) repeat 6 times [66]
- Rnd 40: sc in each st [72] (note your stitches are not BLO in this round)
- change to gray yarn
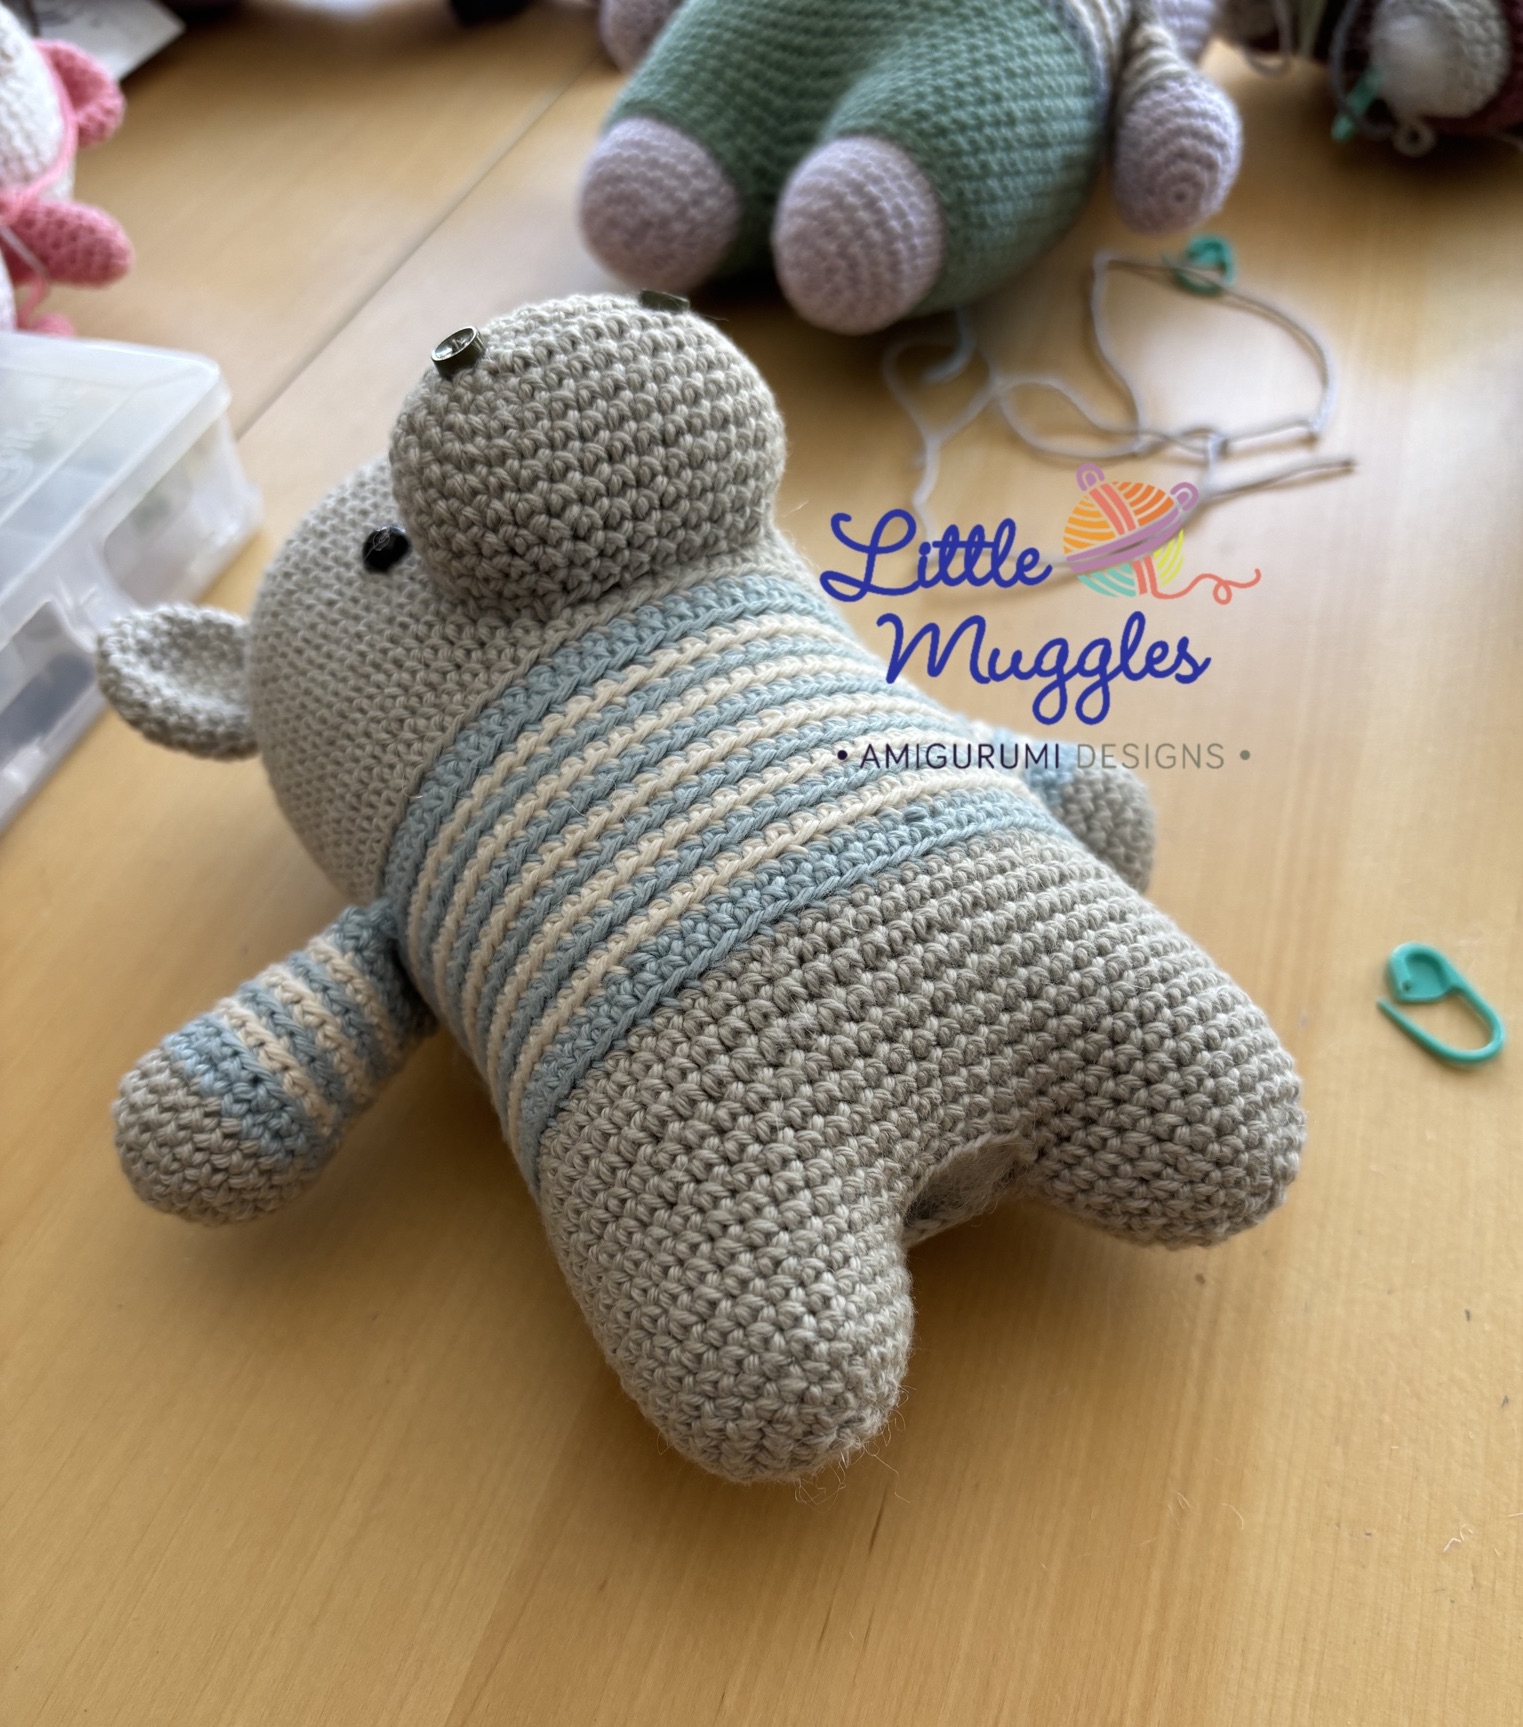
Place the eyes and secure the safety backings at this point. The 9mm eyes should be placed between Rounds 17 and 18 with an interspace of 11 stitches.
- Rnd 41: BLO sc in each st [66]
- Rnd 42: (sc in next 9st, dec) repeat 6 times [60]
- Rnd 43-50: sc in each st [60]
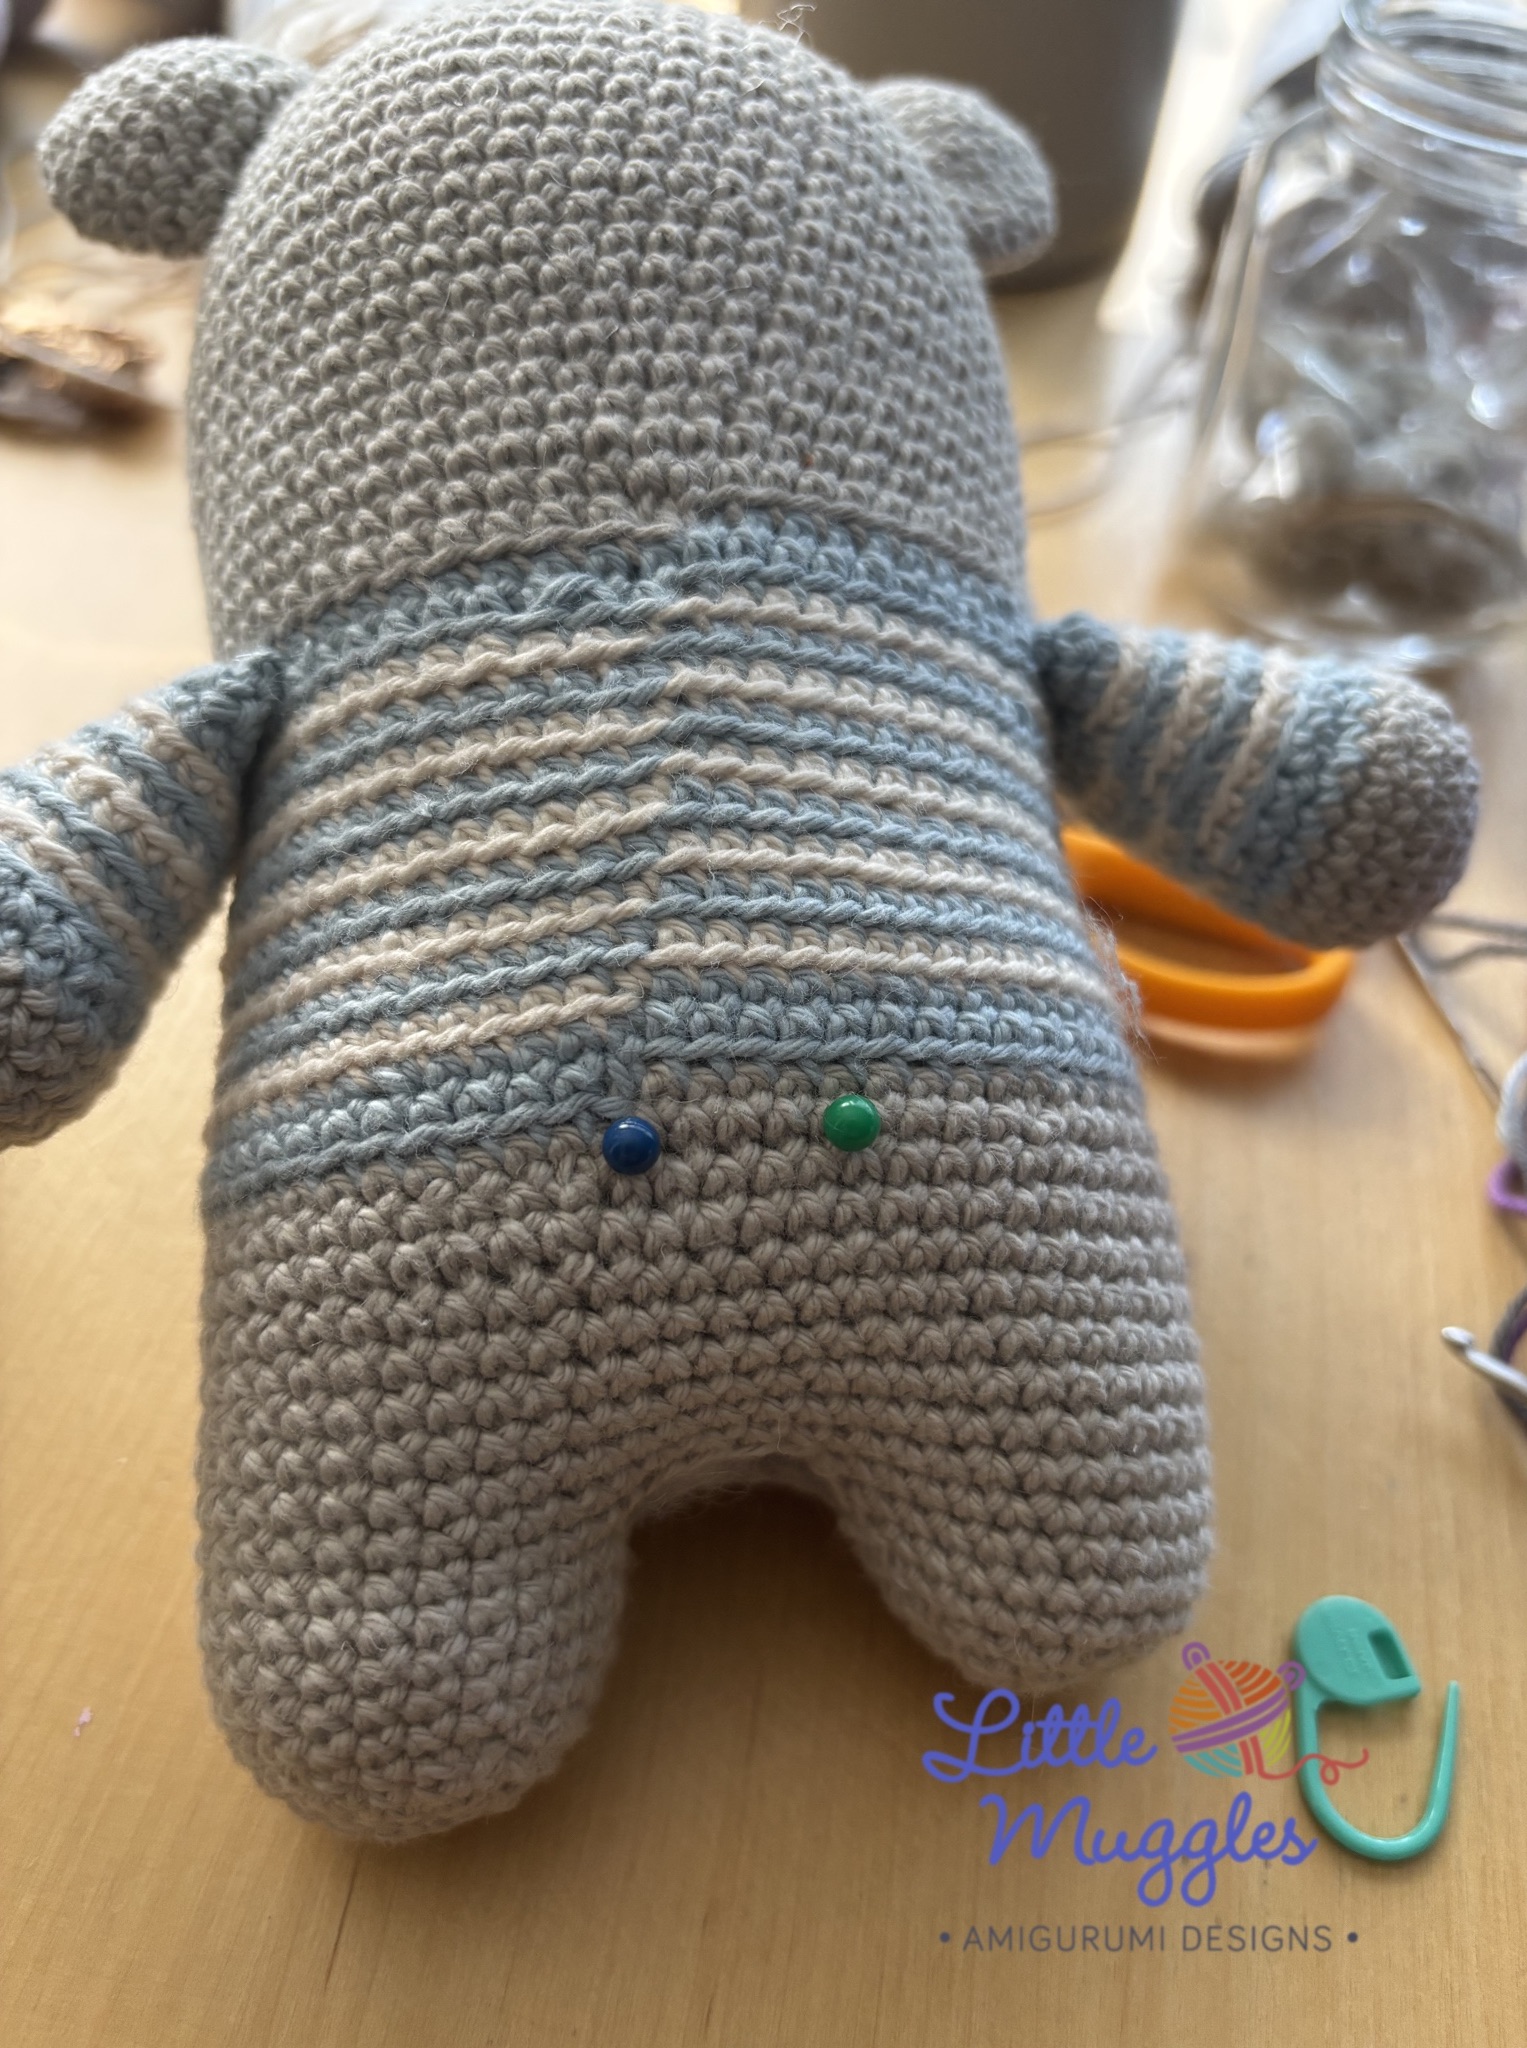
- Place a stitch marker into Stitch # 4 and join it with #34. Place a 2nd stitch marker in Stitch #7 and join it with Stitch #31.

Hold your work as in the picture above. You will now work into the opening to the right of the orange stitch marker, which is also the Hippo’s left leg.
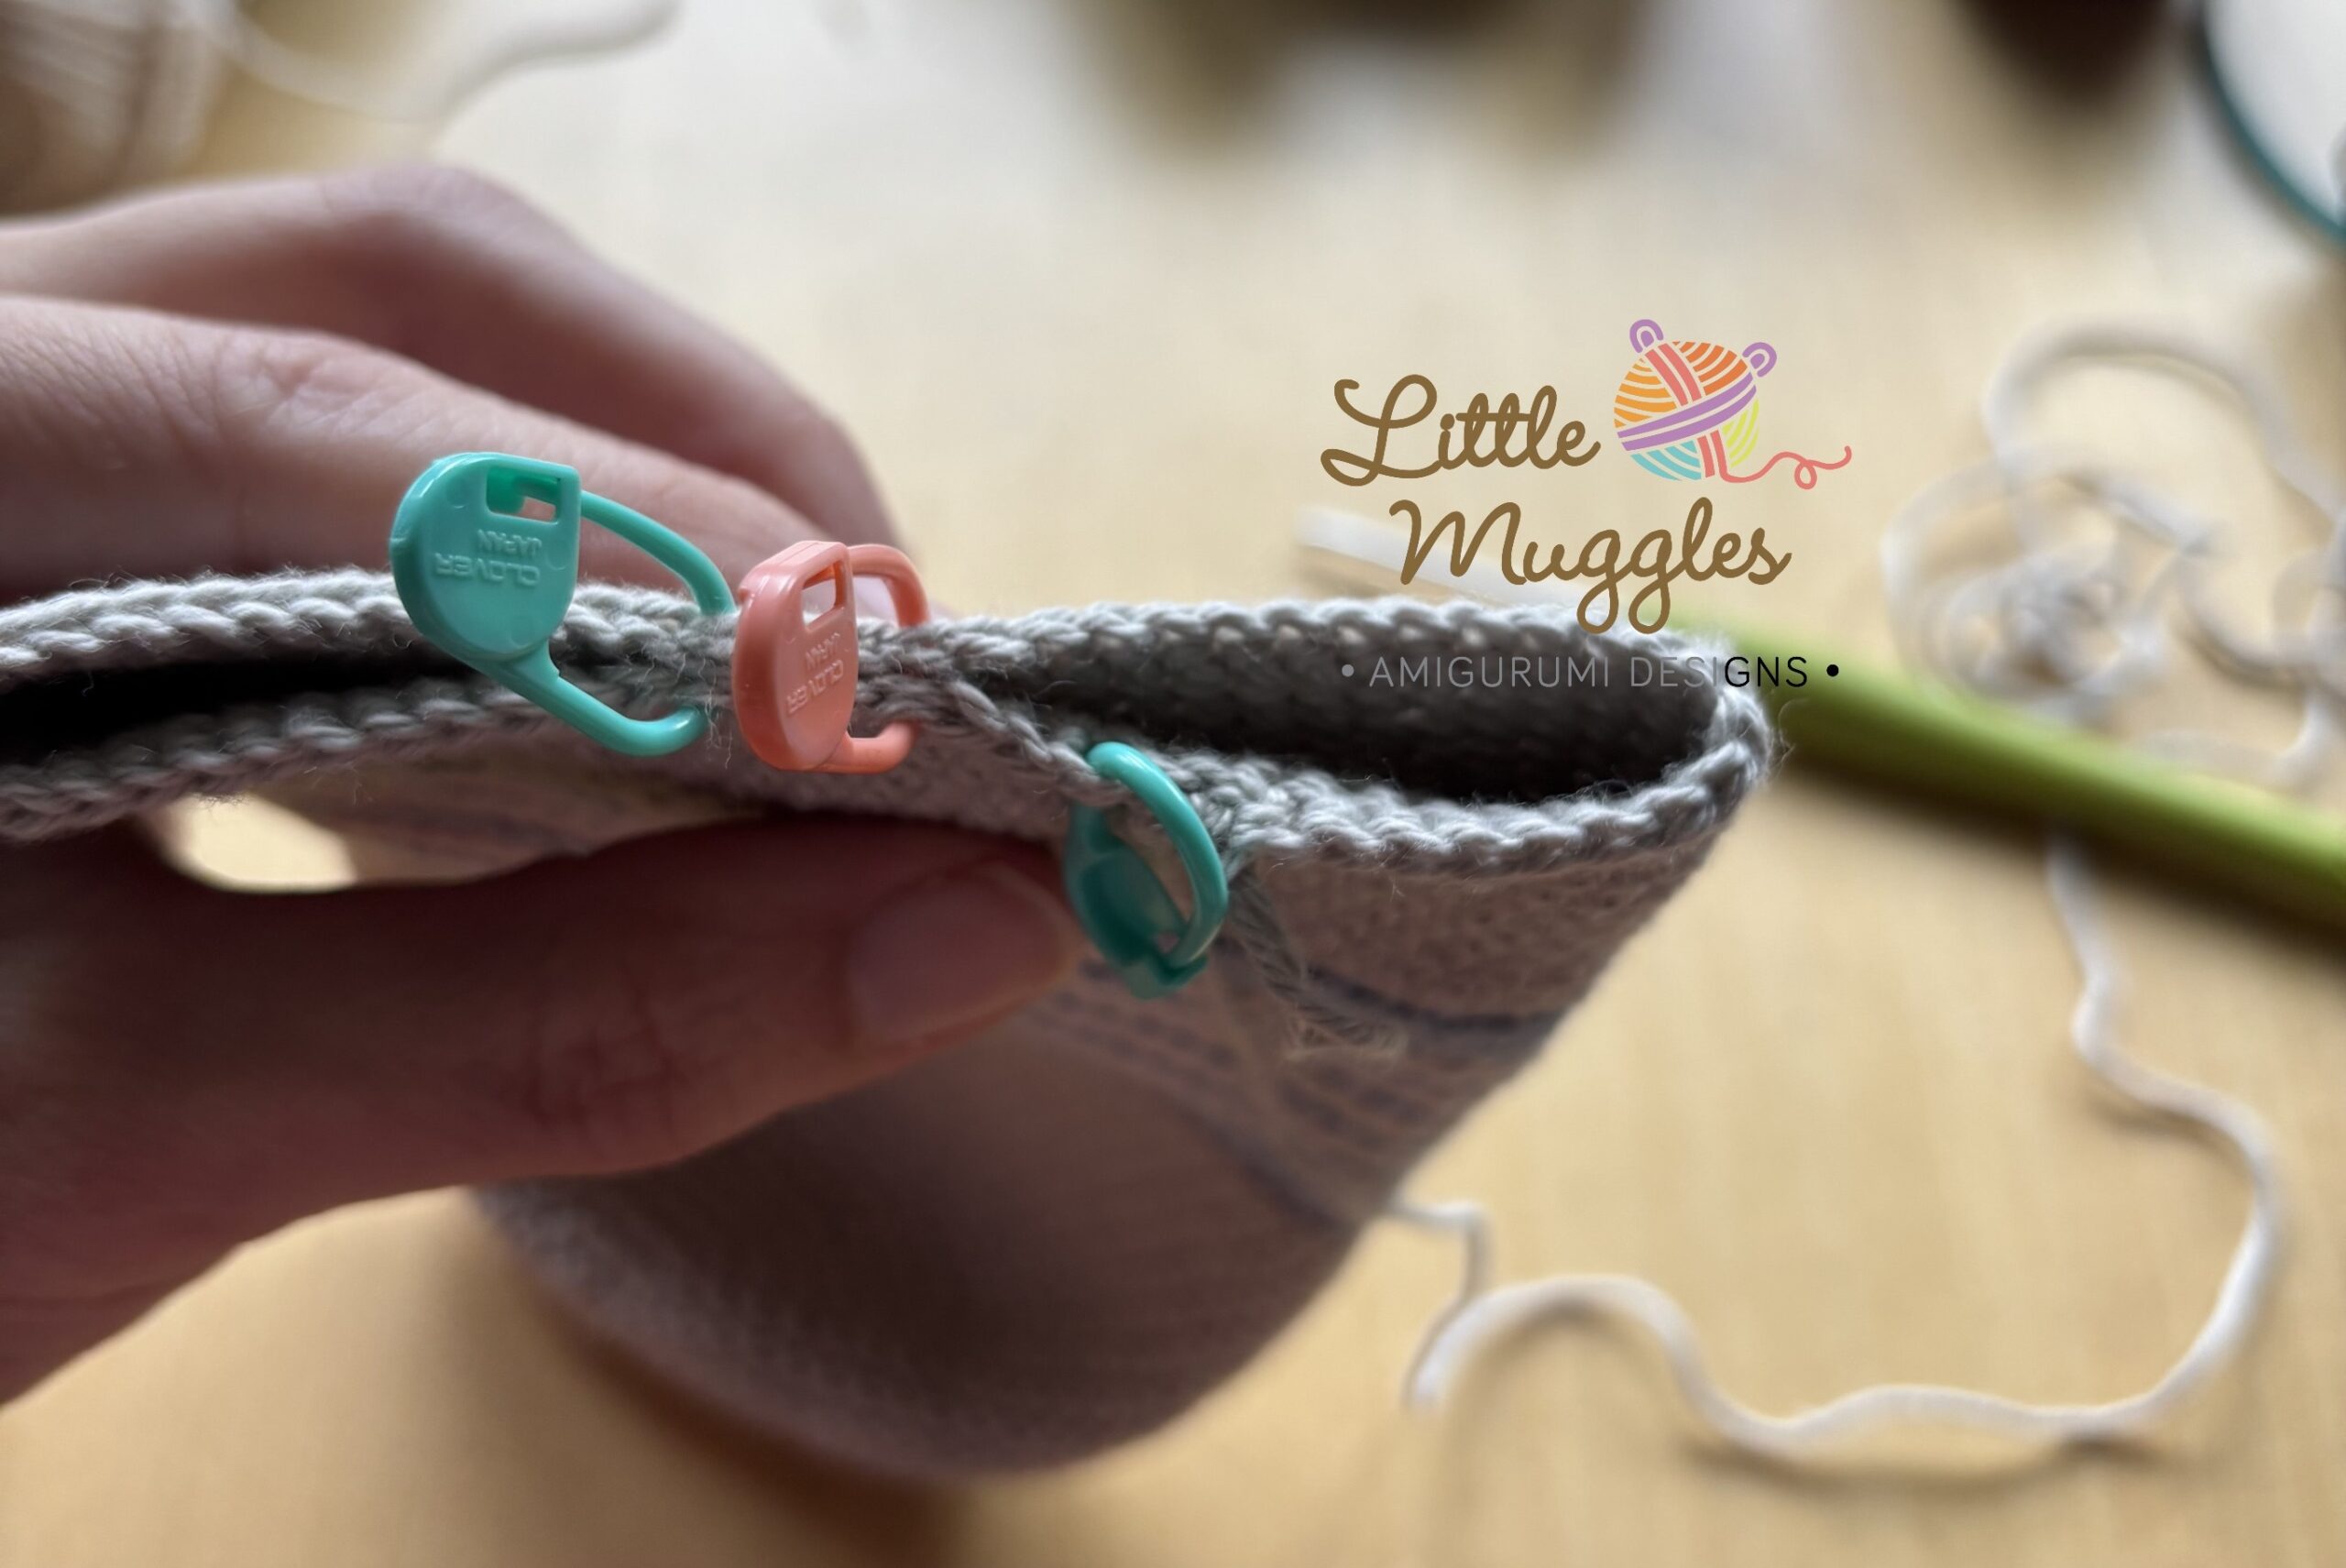
- Rnd 1: sc in next 3 st, continue onto the other side, into the stitch next to the orange marker. This should be stitch #35. Sc into each stitch to get back to the beginning of the round. There should be a total of 26 st in this round.
- Rnd 2: sc in each st [26]
- Rnd 3: sc in next 2 st, dec, sc in remaining 22 st [25]
- Rnd 4: sc in next 2 st, dec, sc in remaining 21 st [24]
- Rnd 5: (sc in next 2 st, dec) repeat 6 times [18]
- Rnd 6: sc in each st [18]
- Bind off and close the opening neatly.
At this point, you should stuff the body and the one completed leg with fiber-fill.
- Rnd 1: To make the 2nd leg, start by pulling up a loop in the stitch next to the the stitch marker (original Stitch # 8) and make a slst. Make a sc into this same stitch. Place a new stitch marker into this stitch – this is now Stitch#1 of this leg. Work around the leg by making 26 stitches to get back to Stitch #1. You will continue working in the round. Note: there are 4 stitches left unworked between the legs in the front and back.
- Rnd 2: sc in each st [26]
- Rnd 3: sc in next st, dec, sc in remaining 23 st [25]
- Rnd 4: dec, sc in remaining 23 st [24]
- Rnd 5: (sc in next 2 st, dec) repeat 6 times [18]
- Rnd 6: sc in each st [18]
- Bind off and close the opening neatly
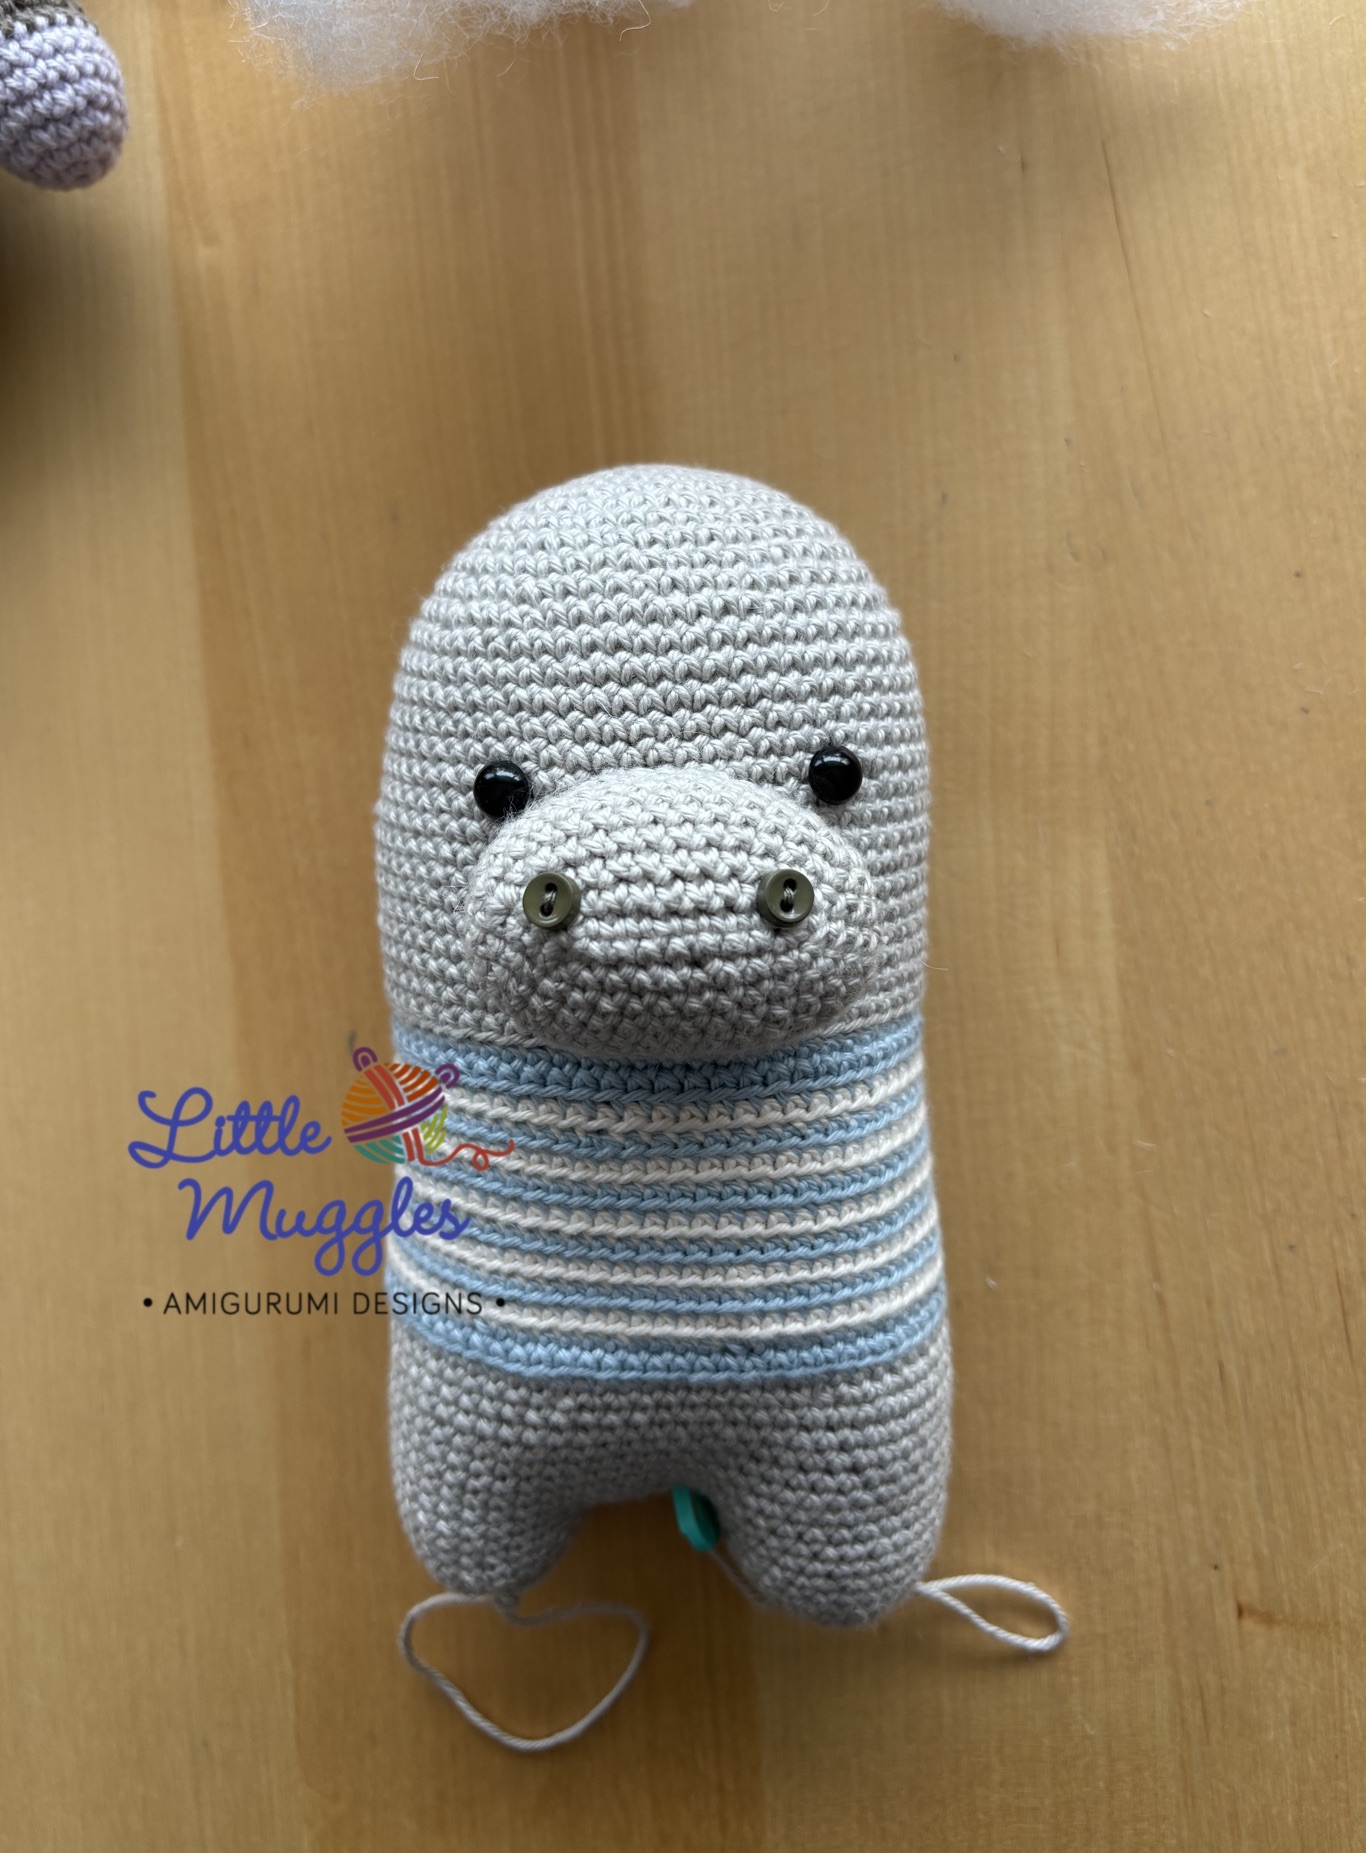
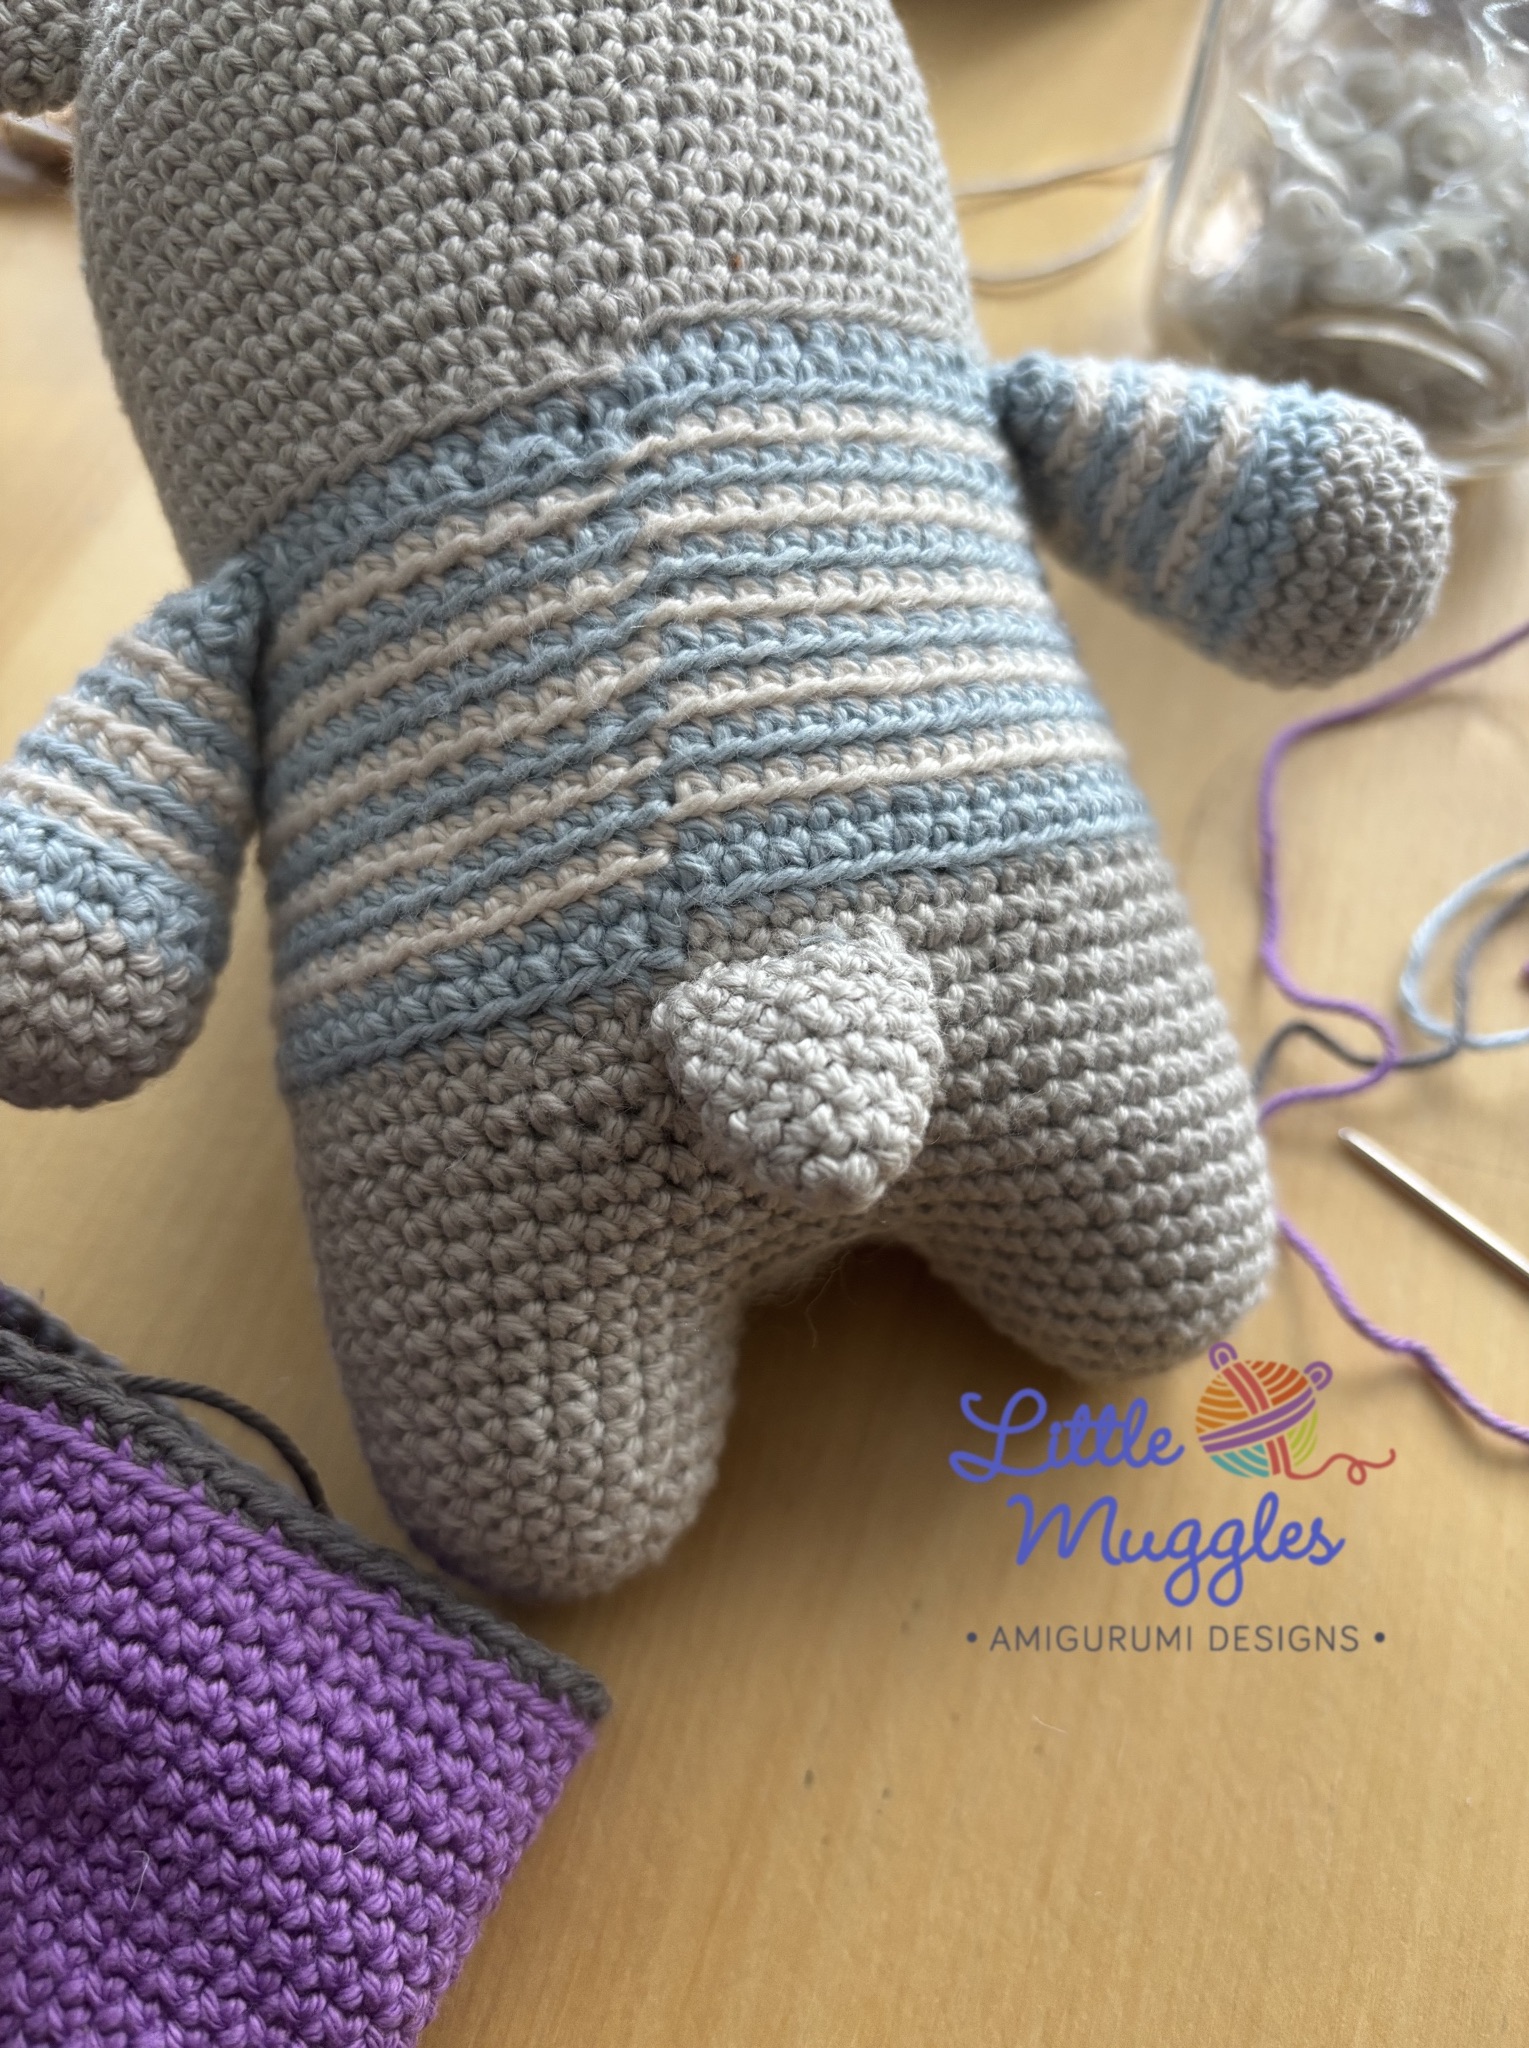
Finish stuffing the body generously with fiberfill and then sew the opening between the legs shut. For my own personal preference, I like to attach the snout, ears, and arms before I completely sew the opening shut. I like to see if there needs to be any last minute stuffing before I close things up! But it doesn’t really matter what order things are done, as long as they are done. 🙂
SNOUT
Chain 10. Starting in the 2nd chain from hook, sc in 8st, 3sc in next st. Continuing in the next st on the other side of the chain, sc in the next 7 st, inc in the last stitch. This brings you back to the beginning of the round. [20] The next stitch is Stich#1 as you continue in the round.
- Rnd 1: inc, sc in next 7 st, inc in next 2st, sc in next 9 st, inc in last st [24]
- Rnd 2: sc in next st, inc, sc in next 8st, inc, sc in next st, inc, sc in next 10 st, inc in last st [28]
- Rnd 3: sc in next st, inc, sc in next 11st, inc, sc in next st, inc, sc in next 11 st, inc in last st [32]
- Rnd 4: sc in next 2 st, inc, sc in next 12 st, inc, sc in next 2 st, inc, sc in next 12 st, inc in last st [36]
- Rnd 5-7: sc in each st [36]
- Rnd 8: sc in next 2 st, dec, sc in next 11st, dec, sc in next 3 st, dec, sc in next 12 st, dec [34]
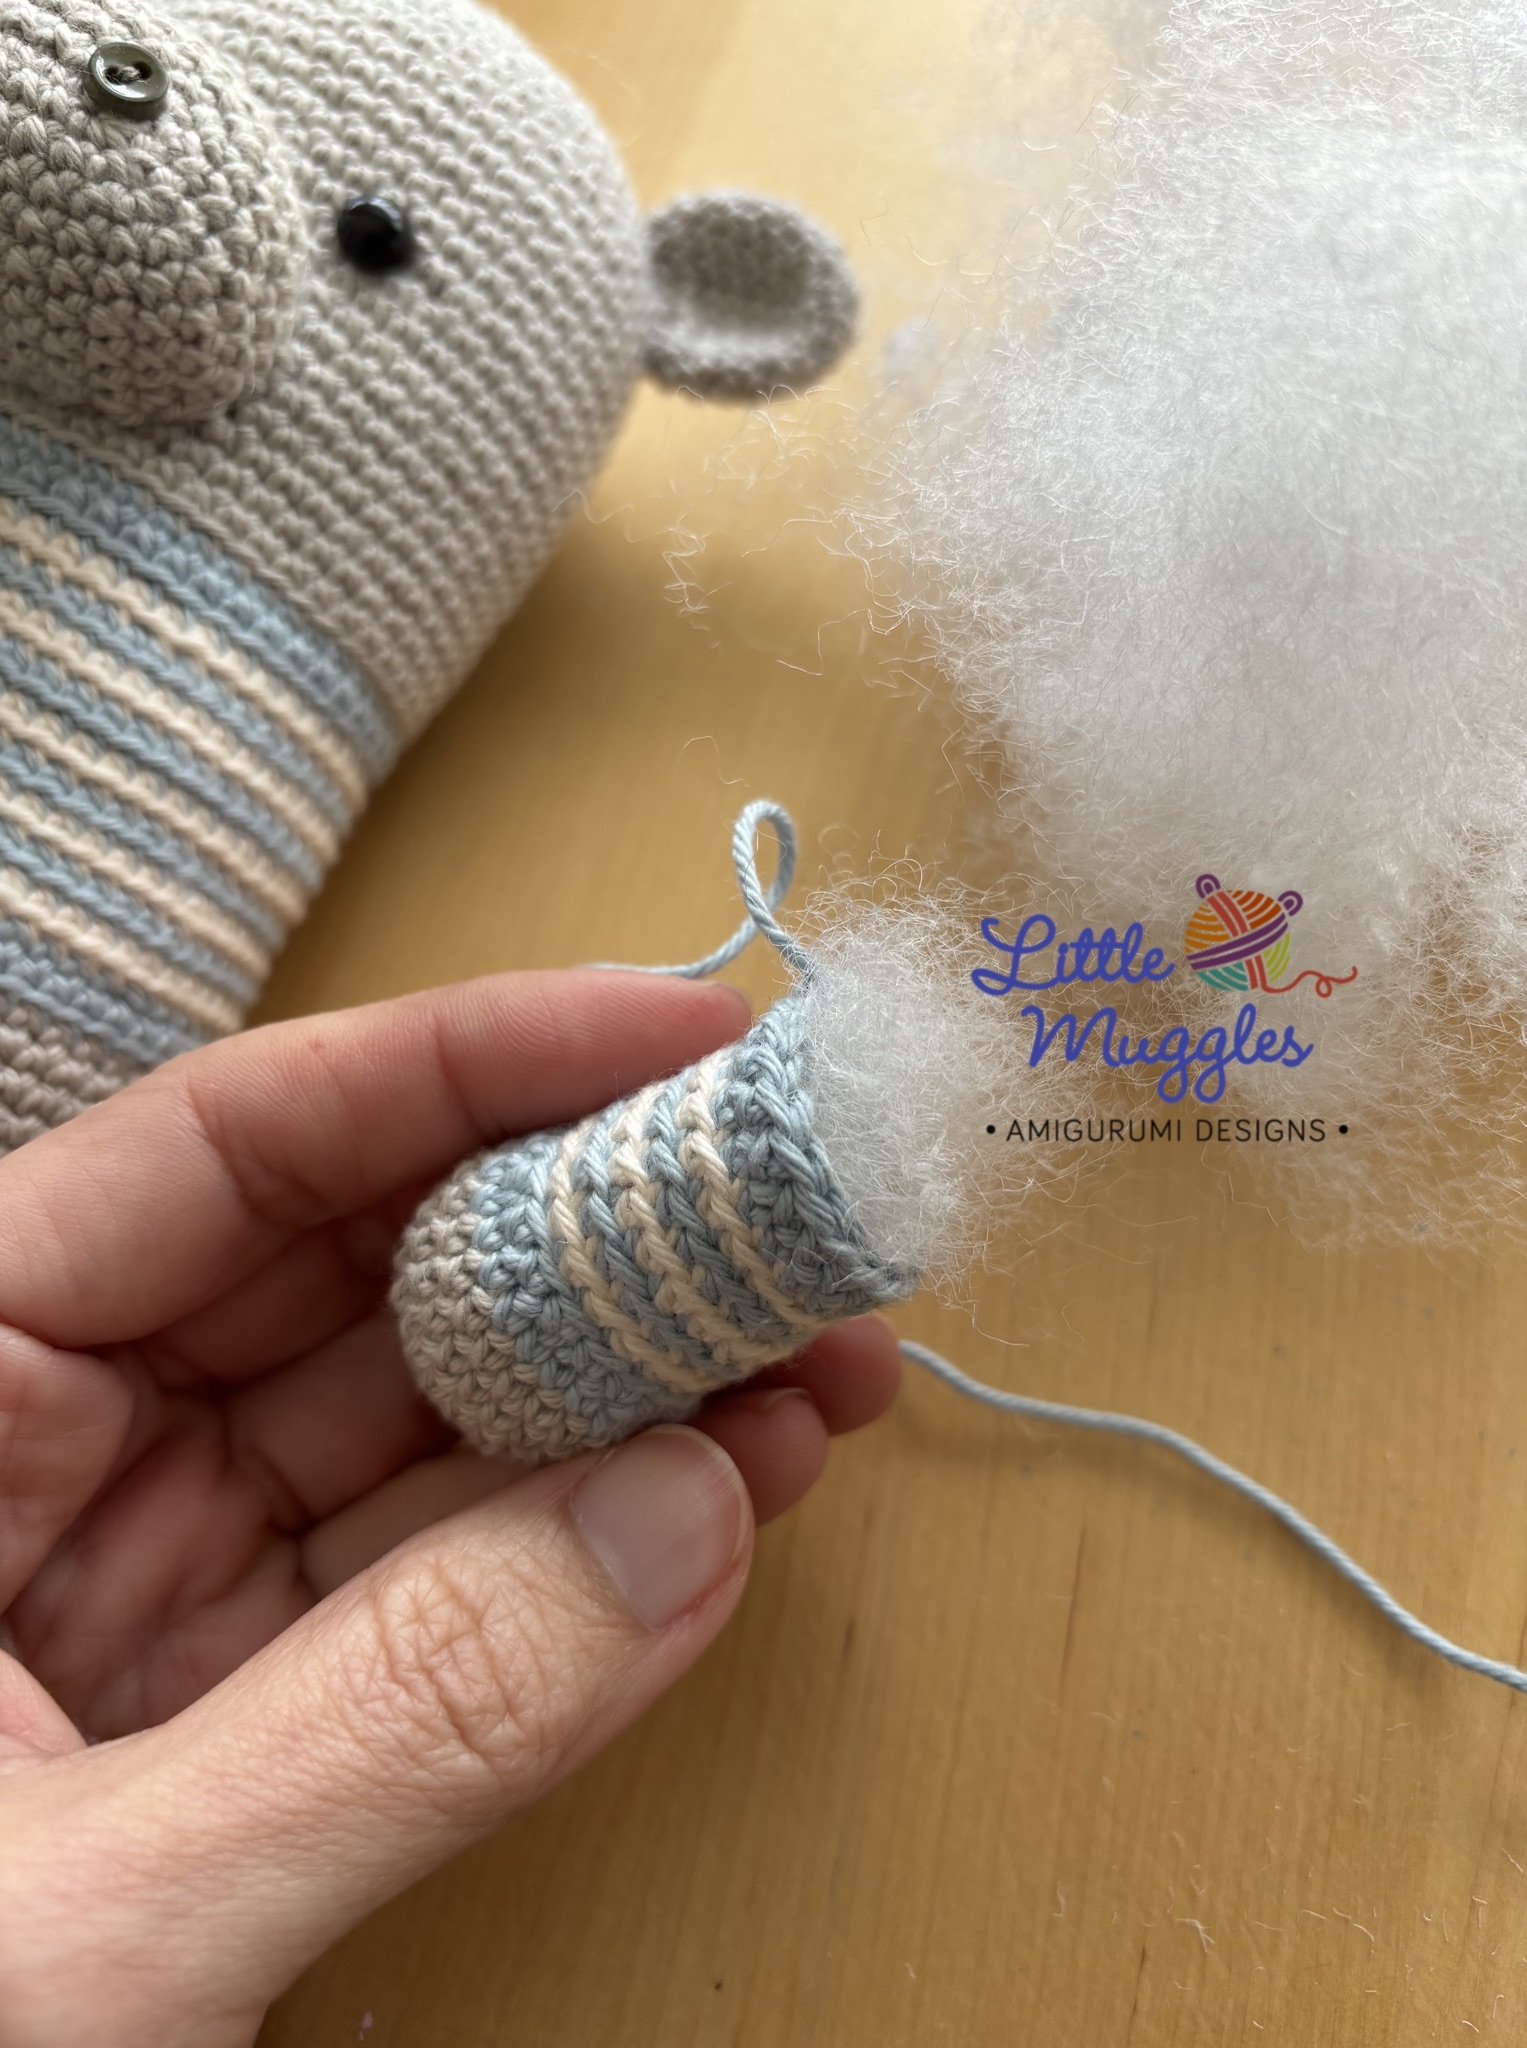
- Bind off and leave a tail for sewing onto head
Stuff the snout with fiber-fill before attaching to the head. Next, sew two small buttons onto the snout to serve as nostrils. Be sure to center the snout before attaching. Please refer to my photos for positioning.
ARM
(make two) start with gray yarn
- Rnd 1: make 6sc into magic ring
- Rnd 2: 2sc in each st [12]
- Rnd 3: (sc in next st, 2sc into next st) repeat 6 times [18]
- Rnd 4: (sc in next 2 st, 2sc into next st) repeat 6 times [24]
- Rnd 5-6: sc in each st [24]
- change to blue yarn
- Rnd 7: sc in each st [24]
- Rnd 8: (sc in next 2 st, dec) repeat 6 times [18]
- change to cream yarn. Each subsequent round should alternate between blue and cream.
- Rnd 9-14: BLO sc in each st [18] – you should end with a round with blue yarn. Continue with blue yarn
- Rnd 15: sc in each st [18]
- Bind off, stuff the arm with fiberfill and sew the opening shut before attaching to the body. The arms should be attached where the first round of blue of the shirt begins (Round 28/29 of the body)
EAR
(make two) use gray yarn
- Rnd 1: make 6sc into magic ring
- Rnd 2: 2sc into each st [12]
- Rnd 3: sc in each st [12]
- Rnd 4: (sc in next st, inc in next st) repeat 6 times [18]
- Rnd 5-9: sc in each st [24]
- Bind off and sew opening shut before attaching to head. The ears in my doll are attached at approximately Round 8.
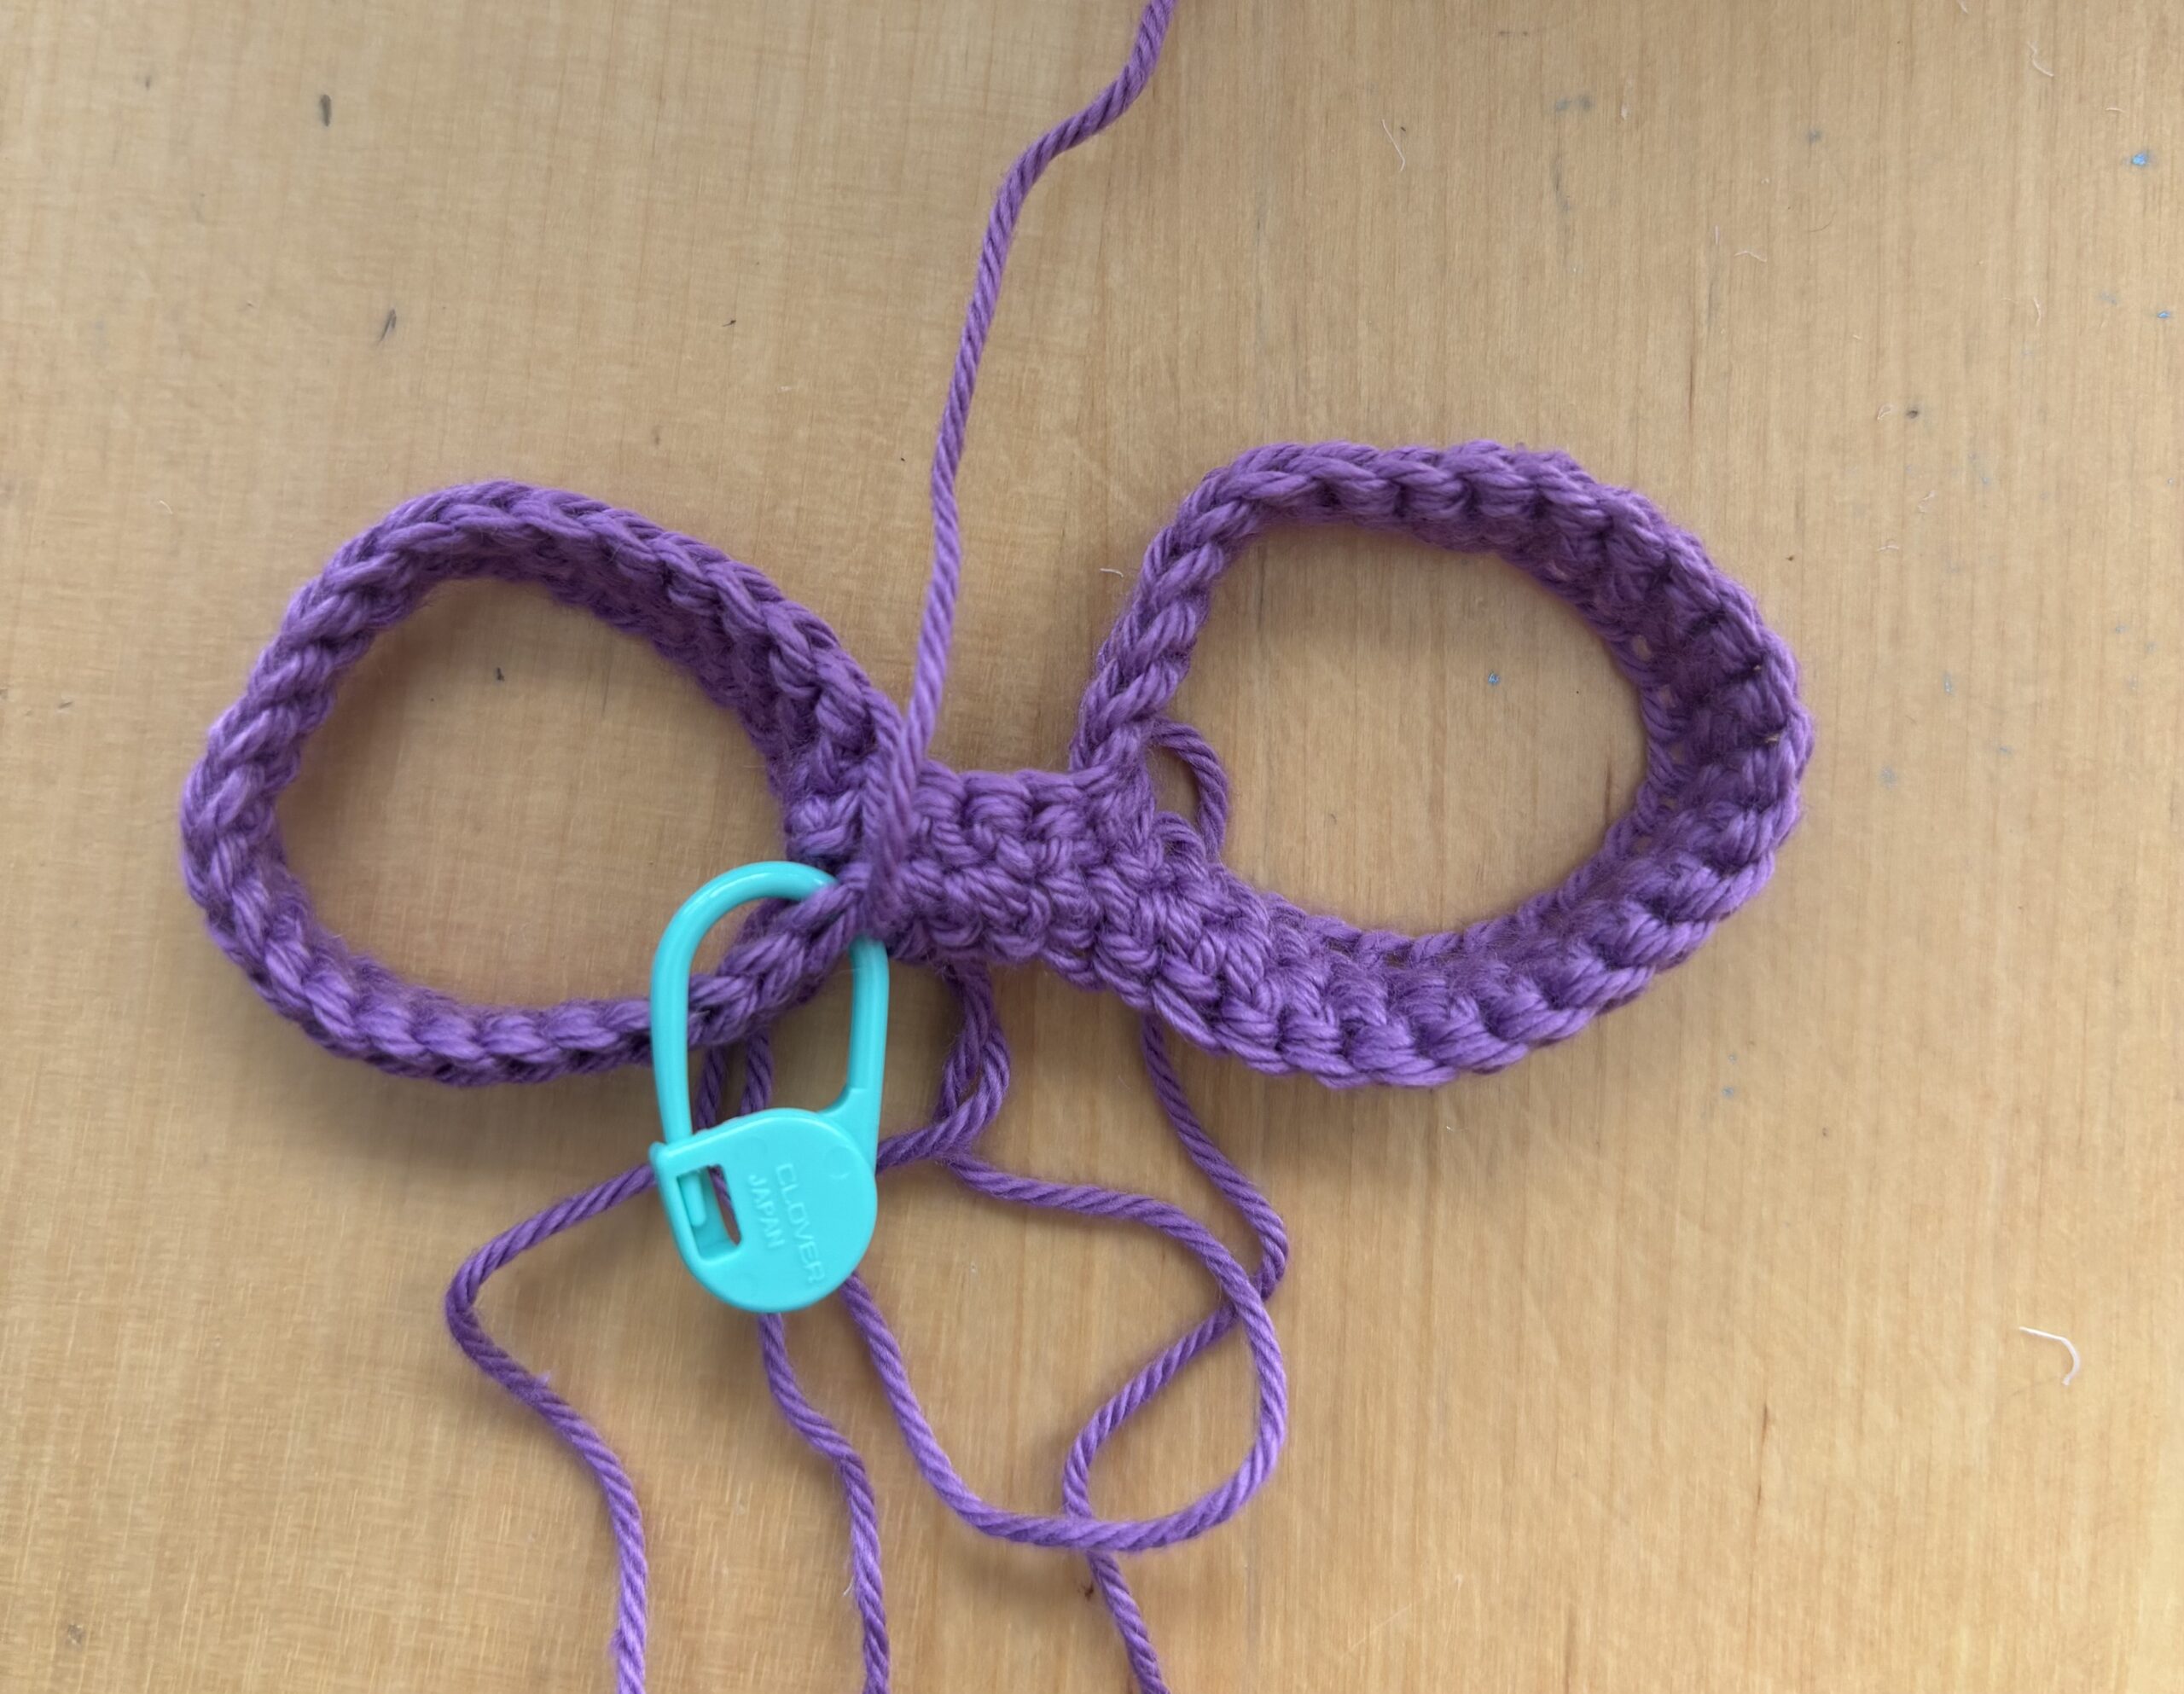
PANTS
- Chain 26 and connect with a slst.
- Sc in all 26st [26]
- Bind off . this is one leg of the pants. Repeat for the 2nd pant leg…
- Chain 26 and connect with a slip stitch.
- Sc in all 26 st [26]
- Chain 4 and work your following stitch into what would have been the next stitch of the first pant leg. Place a stitcher marker into this stitch, it is now your Stitch#1 as you continue. Continue around that pant leg by crocheting in 26 st. This brings you around to the chain. Sc into the 4 st of the chain and continue around the 2nd pant leg for 26 st. Sc in the next 4 st of the chain and this brings you back to your stitch marker. [60]
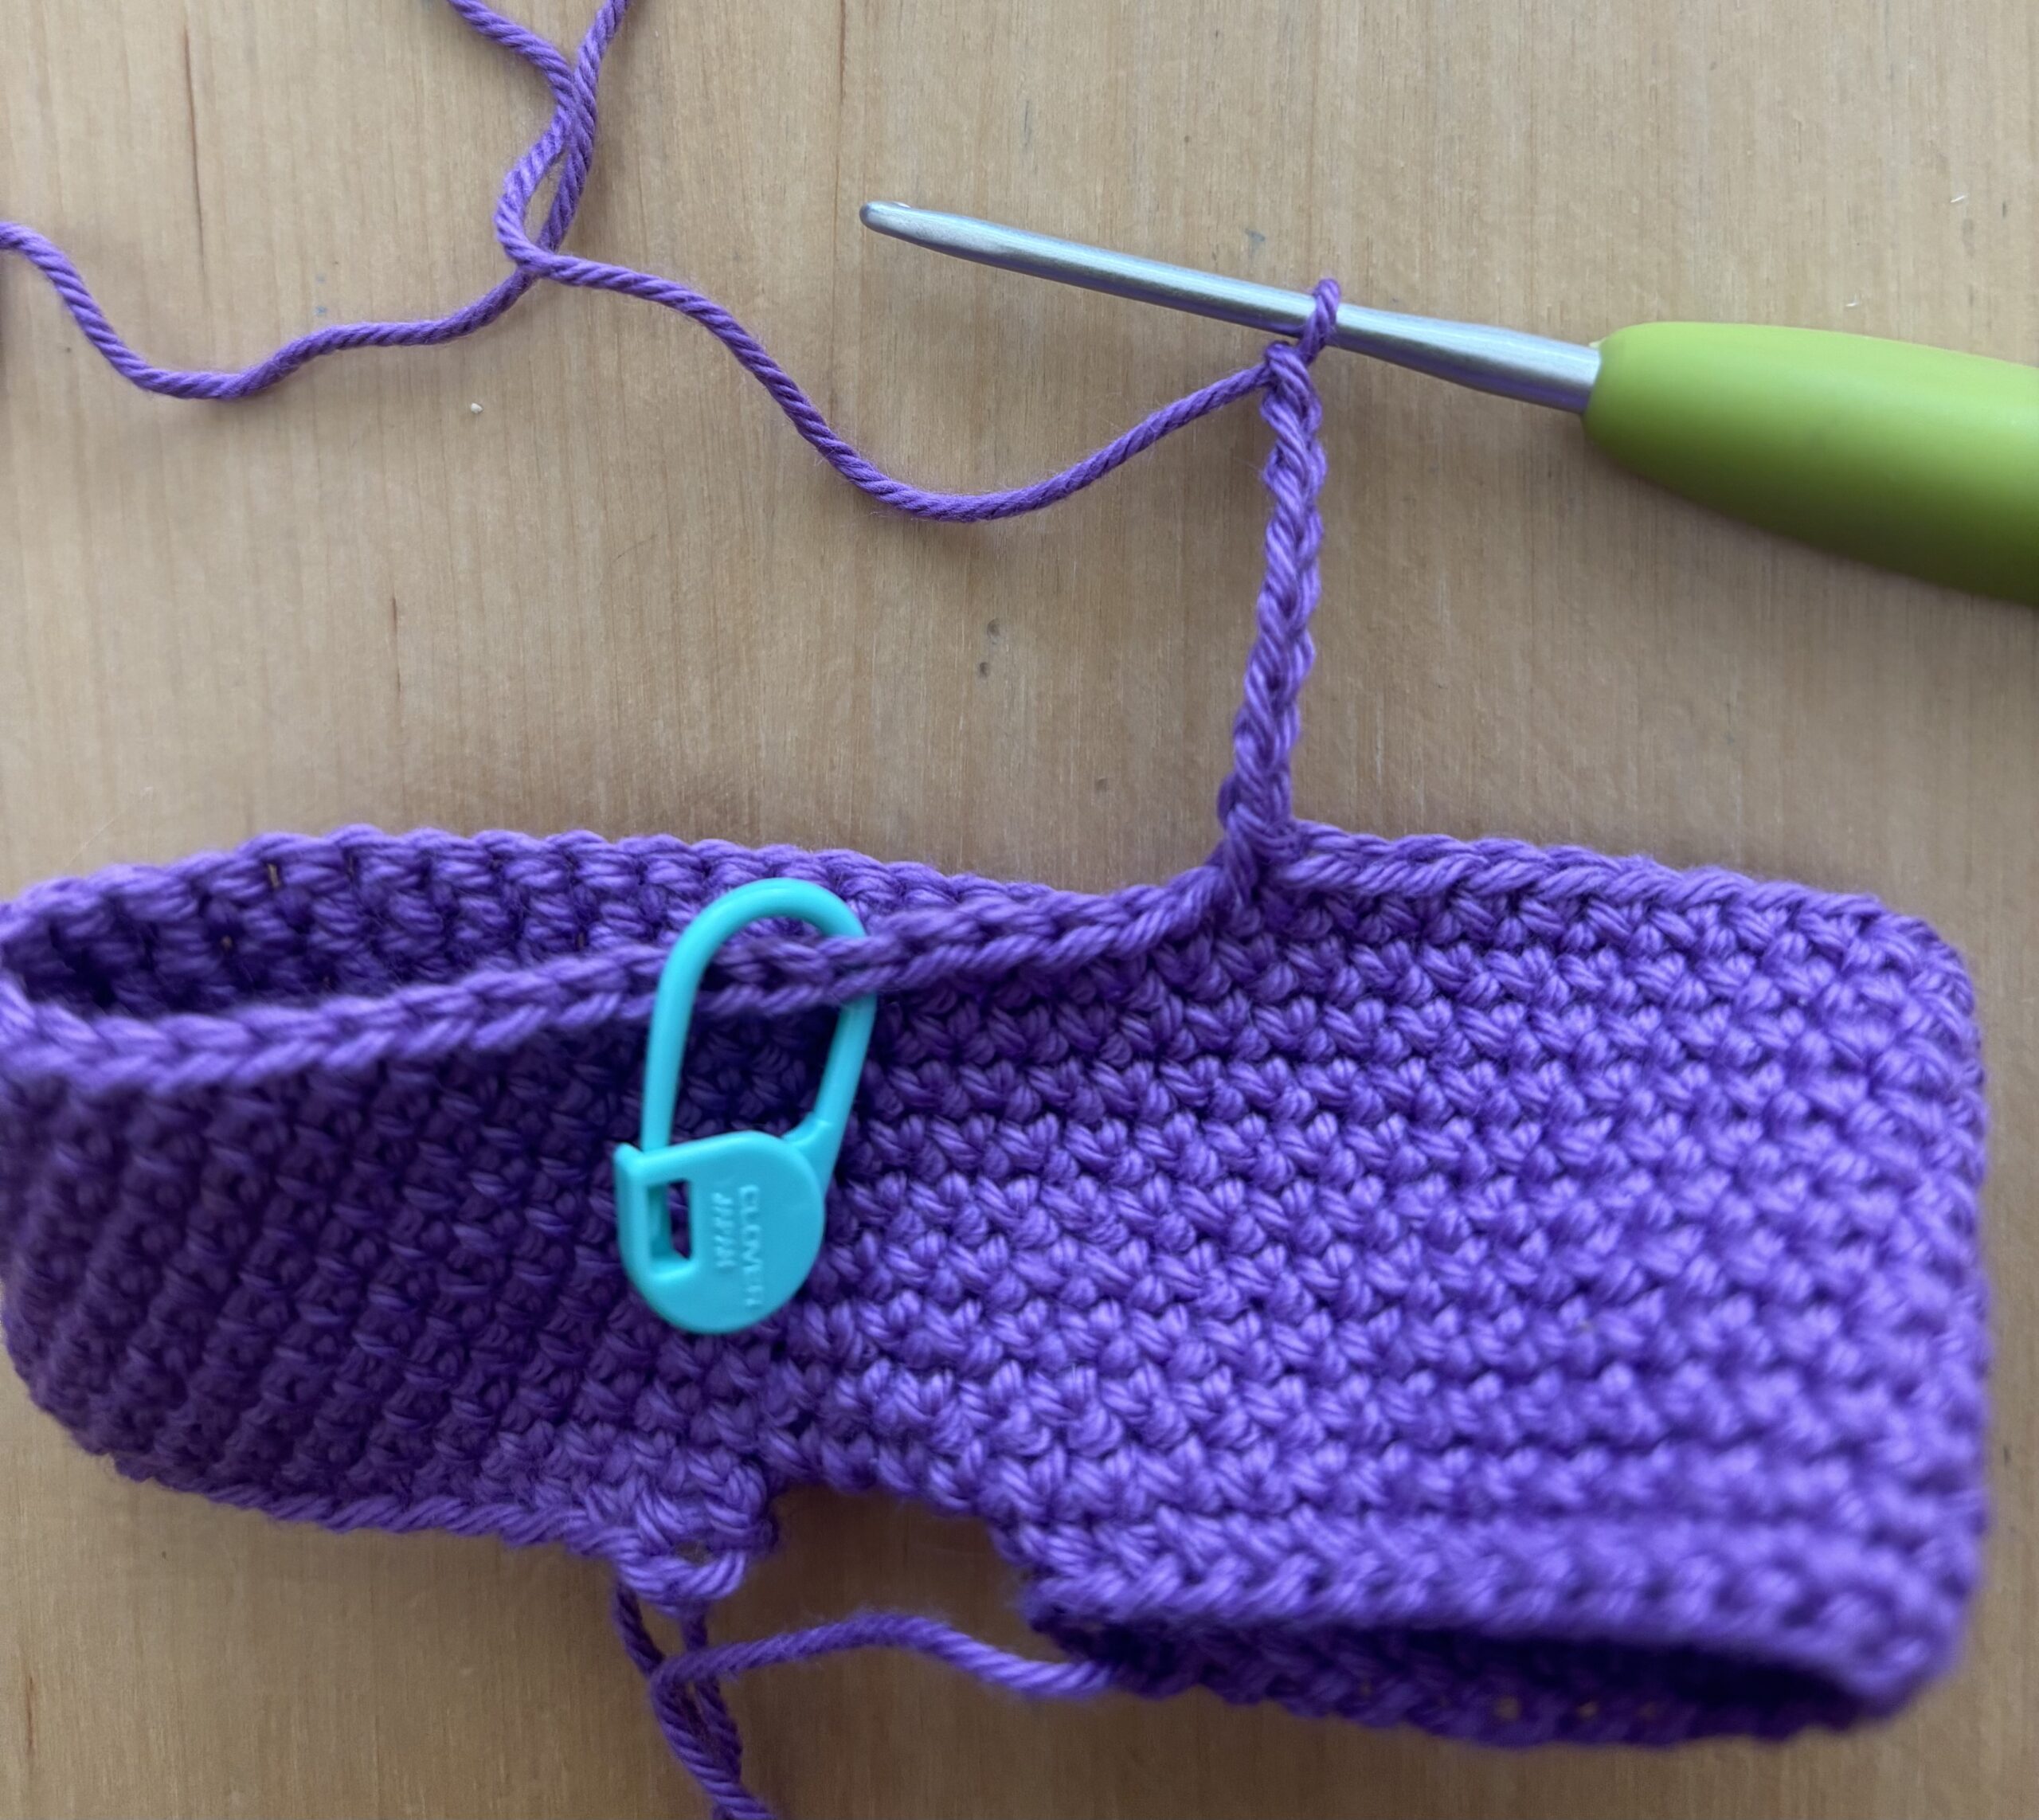
- Rnd 1-7: sc in all 60st [60]
- Rnd 8: sc in next 56st, chain 7, sk7, sc into the 8th st. (remove the original stitch marker, you are essentially crocheting in to the 3rd stitch of the original round) Place a stitch marker into this stitch. It will now be your new Stitch#1 in the subsequent rounds.
- Rnd 9: sc in next 53st, continue onto the chain. sc in the next 7st [60]
- Rnd 10-13: sc in all 60st [60]
- change to contrasting yarn
- Rnd 14: BLO dc in all 60st [60]
TAIL
use gray yarn
- Rnd 1: make 4sc into magic ring
- Rnd 2: (sc in next st, 2sc into next st) repeat twice [6]
- Rnd 3: (sc in next 2st, 2sc into next st) repeat twice [8]
- Rnd 4: (sc in next 3st, 2sc into next st) repeat twice [10]
- Rnd 5: (sc in next 4st, 2sc into next st) repeat twice [12]
- Rnd 6: (sc in next 5st, 2sc into next st) repeat twice [14]
- sc in all 14st [14]
- Rnd 7: (sc in next 5st, dec) repeat twice [12]
- Bind off. Sew the opening shut before attaching to the body.
Use the photo as a reference – attach the tail on the back of the body, just under the hippo’s “shirt”. When pulling the trousers on, the tail should comfortably stick out through the opening.
And your hippo is now finished! Pat yourself on the back! I hope you enjoyed making your doll! Please feel free to tag me @littlemuggles so I can see your handiwork! XOXO